
If you own a golf cart, you may have encountered the annoying problem of clicking sounds during startup. It’s not uncommon for this occurrence to leave you wondering what’s going on. In this article, we’ll use actual data to investigate the potential causes of your golf cart’s clicking and inability to start. If you are able to eliminate these sources as the problem, your golf cart will be back up and running in no time. Now is the time to investigate the source of the clicking sound coming from your golf cart.
Key Takeaways: Golf Cart Clicking Noises
- Clicking noises in golf carts during startup can be caused by various issues, such as a weak battery,
loose or corroded battery connections, faulty solenoid, or a faulty starter motor. - Troubleshooting steps include checking battery voltage and connections, testing the solenoid and starter
motor, and inspecting for any damages or loose wires. - Regular preventive maintenance is essential to avoid starting issues and clicking noises. This includes
cleaning and tightening battery connections, checking battery water levels, and monitoring battery
voltage. - Seek professional help when troubleshooting steps are inconclusive or when dealing with complex electrical
issues, and for component replacements or repairs that require specialized knowledge and tools.
Possible Causes of Clicking Noise in Golf Carts
If you’re experiencing a clicking noise when trying to start your golf cart, there are several potential causes to consider. Here are some of the possible reasons behind this issue:
1. Weak Battery
A weak battery is one of the most common causes of a clicking noise in a golf cart. When the battery doesn’t have enough power, it may not be able to provide the necessary voltage to start the cart. This can result in a clicking sound as the solenoid tries to engage the starter motor. To address this issue, consider recharging or replacing the battery.
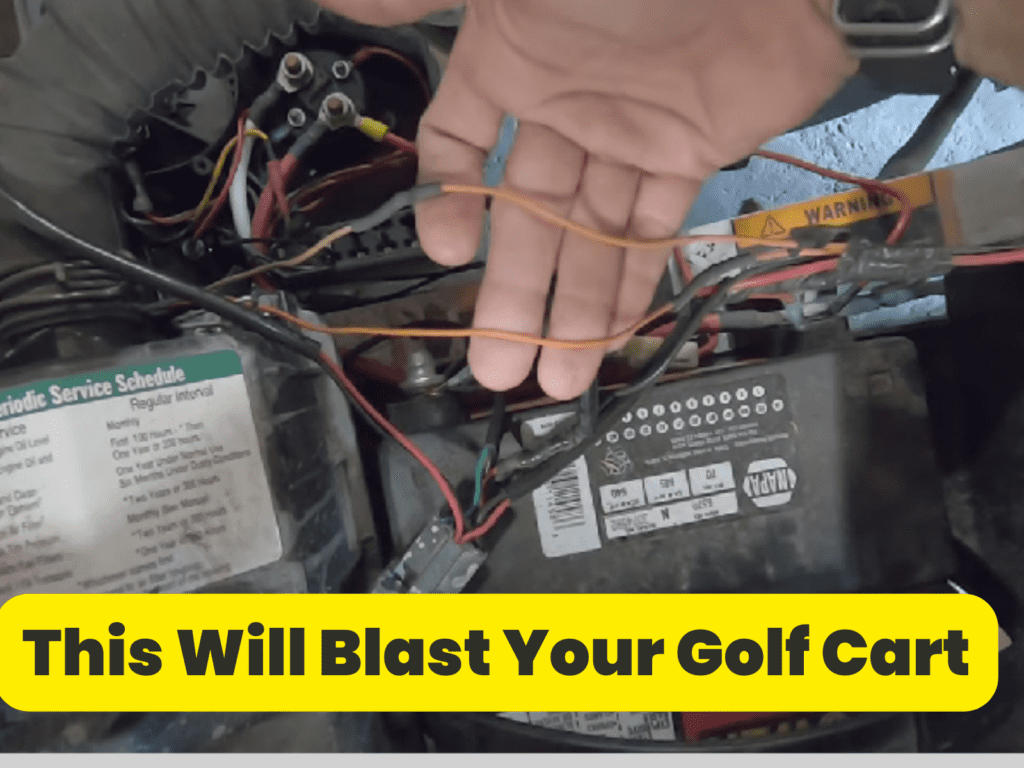
2. Loose or Corroded Battery Connections
Another common cause of a clicking noise is loose or corroded battery connections. Over time, battery connections can become loose or covered in corrosion, preventing the flow of electricity. This can lead to a poor connection and result in a clicking sound as the solenoid attempts to engage the starter motor. It’s important to check and clean the battery terminals and connections regularly to ensure they are secure and free from corrosion.
3. Faulty Solenoid
The solenoid is responsible for transmitting electrical current from the battery to the starter motor. If the solenoid is faulty or worn out, it may fail to engage the starter motor properly, resulting in a clicking noise. In some cases, the solenoid may need to be replaced to resolve the issue. It’s recommended to have a professional inspect the solenoid and determine if it needs to be repaired or replaced.
4. Faulty Starter Motor
The starter motor is responsible for initiating the engine’s rotation when the golf cart is started. If the starter motor is faulty or damaged, it may not be able to turn over the engine, causing a clicking noise. This can be due to various issues such as a worn-out starter motor or internal electrical problems. A qualified technician can diagnose the problem and advise whether the starter motor needs repair or replacement.
Troubleshooting Steps
If you’re experiencing a clicking noise when trying to start your golf cart, here are some troubleshooting steps you can follow:
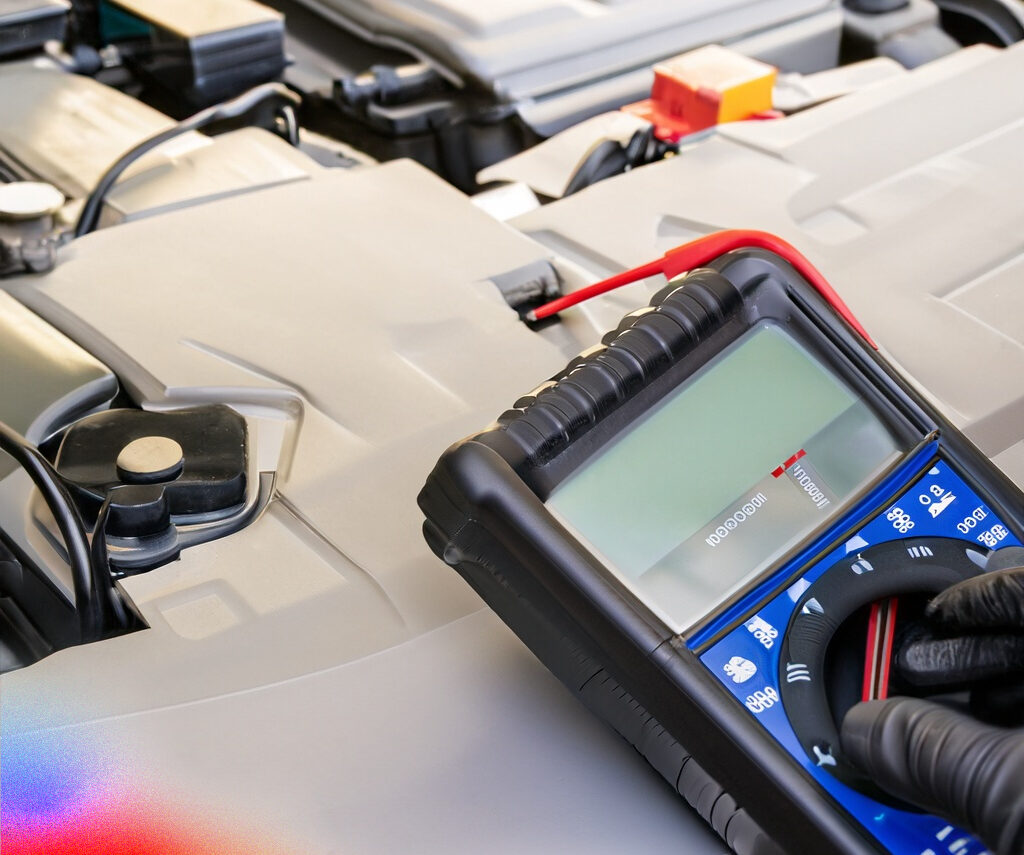
- Check the battery voltage using a multimeter to ensure it has a sufficient charge.
- Inspect the battery terminals for corrosion or looseness, clean them if necessary, and ensure they are securely connected.
- Test the solenoid by bypassing it with a jumper cable to see if the cart starts.
- If the cart starts with the solenoid bypassed, the solenoid may need to be replaced.
- If the clicking noise persists even after performing these steps, it’s recommended to consult a professional technician for further diagnosis and repair.
Remember, electrical systems can be complex, and it’s important to exercise caution when troubleshooting and working with electrical components. If you’re unsure or uncomfortable with performing these steps yourself, it’s best to seek assistance from a qualified technician.
RELATED: How To Remove The Speed Limiter On A Electric Golf Cart?
How to Troubleshoot and Fix a Clicking Noise in Golf Cart
Nothing is more frustrating than getting ready for a day on the golf course, only to find that your golf cart won’t start and is making a clicking noise. But don’t worry, there are a few steps you can take to troubleshoot and fix this issue yourself before calling for professional help. Here’s a step-by-step guide to help you get your golf cart up and running again.
Step 1: Check Battery Voltage and Connections

The first thing you should do when you encounter a clicking noise in your golf cart is to check the battery voltage and connections. The clicking noise typically occurs when there is insufficient power reaching the starter motor.
To check the battery voltage:
- Use a voltmeter to measure the voltage of your golf cart battery.
- A fully charged battery should have a voltage reading of around 12.6 to 12.8 volts. If the voltage is significantly lower, it may indicate a weak or discharged battery.
To check the battery connections:
- Inspect the battery terminals for any signs of corrosion or loose connections.
- Use a wire brush to clean the terminals and ensure a good connection.
- Tighten any loose connections and make sure all cables are securely attached to the battery terminals.
Note: If you find any issues with the battery voltage or connections, it’s important to address them before moving on to the next steps.
Step 2: Test the Solenoid
If the battery and connections are in good condition, the next step is to test the solenoid. The solenoid is responsible for connecting the battery to the starter motor and engaging the motor to start the golf cart.
To test the solenoid:
- Locate the solenoid, which is usually mounted on the passenger side of the golf cart’s engine compartment.
- Use a multimeter set to the ohms setting to check for continuity across the solenoid’s terminals.
- If the solenoid does not have continuity, it may be faulty and need to be replaced.
Note: If you’re unsure how to test the solenoid or do not have a multimeter, it’s best to consult a professional for assistance.
Step 3: Test the Starter Motor
If the solenoid is functioning properly, the next step is to test the starter motor. The starter motor is responsible for physically turning the engine over to start the golf cart.
To test the starter motor:
- Locate the starter motor, which is typically attached to the engine block.
- Tap the starter motor lightly with a hammer or mallet while someone else turns the key to start the golf cart.
- If the golf cart starts when you tap the starter motor, it may indicate that the starter motor brushes are worn and need to be replaced. In this case, it’s best to consult a professional for further assistance.
Step 4: Replace Faulty Components
If you have followed all the steps above and are still experiencing a clicking noise and your golf cart won’t start, it may be necessary to replace faulty components such as the solenoid, battery, or starter motor. You can consult a professional technician or reference your golf cart’s manual to determine the specific replacement parts needed.
By following these steps and troubleshooting the clicking noise in your golf cart, you can get back on the course and enjoy your round of golf. It’s important to remember that if you’re unsure about any of the steps or don’t have the necessary tools, it’s always best to seek professional assistance to avoid further damage to your golf cart. Happy golfing!
RELATED: What Are The Top Features To Look For In A Golf Cart?
Preventive Maintenance for Golf Cart Electrical System
To avoid encountering issues with your golf cart’s electrical system, regular preventive maintenance is crucial. Here are some steps you can take to keep your golf cart running smoothly and avoid the frustration of a clicking noise when trying to start it.
Regular Battery Maintenance
The battery is one of the most critical components of an electric golf cart. To ensure optimal performance and prevent starting issues, follow these battery maintenance tips:
- Check battery water levels: Regularly inspect the water levels in your golf cart battery. If necessary, add distilled water to maintain the appropriate levels.
- Clean the battery terminals: Over time, corrosion can build up on the battery terminals, affecting the connection. Use a battery terminal cleaner or a mixture of baking soda and water to clean the terminals. Be sure to disconnect the battery cables before cleaning.
- Inspect for damage: Check the battery casing for any cracks or leaks. If you notice any issues, it may be time to replace the battery.
- Monitor battery voltage: Using a voltmeter, check the battery voltage regularly. A fully charged battery should have a voltage reading between 12.6V and 12.8V. If the voltage is significantly lower, it may indicate a battery problem.
Cleaning and Tightening Battery Connections
Loose or dirty battery connections can cause starting issues in a golf cart. To ensure a secure and reliable connection, follow these steps:
- Disconnect the battery cables: Before cleaning and tightening the battery connections, always disconnect the battery cables to prevent any accidental electrical shock.
- Clean the terminals and cable ends: Use a wire brush or sandpaper to remove any corrosion or debris from the battery terminals and cable ends. Make sure to clean both the positive and negative terminals.
- Apply an anti-corrosion spray: After cleaning, apply an anti-corrosion spray or petroleum jelly to the battery terminals and cable ends. This will help prevent future corrosion.
- Tighten the connections: Firmly reconnect the battery cables to the appropriate terminals. Ensure that the connections are secure but avoid overtightening, as this can damage the terminals.
Inspecting and Testing the Solenoid and Starter Motor

If your golf cart still experiences starting issues after following the above steps, it may be necessary to inspect and test the solenoid and starter motor. Here’s what you can do:
- Check solenoid connections: Inspect the solenoid for loose or disconnected wires. Ensure that all connections are tight and secure.
- Test the solenoid: Using a multimeter, test the solenoid for continuity. Follow the manufacturer’s instructions to perform the test accurately.
- Inspect the starter motor: Check the starter motor for any signs of damage or excessive wear. If you notice any issues, it may be necessary to replace the starter motor.
Regular maintenance and inspections of the battery, connections, solenoid, and starter motor can help prevent starting issues and ensure a reliable electrical system in your golf cart.
Remember to always refer to your golf cart’s manufacturer manual for specific maintenance instructions. If you’re unsure about any maintenance tasks, it’s best to consult a professional or a golf cart technician to avoid causing further damage to your vehicle.
When to Seek Professional Help for Golf Cart Clicking Noise
While there are several troubleshooting steps you can take to diagnose and resolve a clicking noise in your golf cart, there are instances where it’s best to seek professional help. Here are two situations where professional intervention may be necessary:
1. Complex Electrical Issues
Sometimes, the clicking noise in your golf cart may be a result of complex electrical issues that require the expertise of a trained technician. These issues can be challenging to diagnose and repair without the proper knowledge and equipment. It’s essential to seek professional help in the following scenarios:
– Wiring Problems: If you suspect a wiring problem or notice any exposed wires, it’s crucial to have a professional electrician inspect and fix the issue. Tampering with electrical wiring without the necessary skills can be dangerous and cause further damage to your golf cart.
– Battery Troubles: If you have ruled out battery-related causes and the clicking noise persists, it’s advisable to consult a professional. They can perform a comprehensive battery test to determine if the issue lies with the battery or if there are other underlying electrical problems.
– Controller Malfunctions: The controller is an essential component of the golf cart’s electrical system. If you suspect a malfunctioning controller, it’s best to leave it to the experts. They will have the knowledge and tools to diagnose and repair the problem effectively.
RELATED: How to Trick Golf Cart Charger? [Easy & Step-by-Step]
2. Need for Component Replacement or Repair
If you have gone through the troubleshooting steps and still cannot identify the source of the clicking noise, or if you have identified a faulty component, seeking professional help for component replacement or repair is recommended. Here’s when a professional’s assistance may be necessary:
– Solenoid Issues: The solenoid plays a vital role in the golf cart’s electrical system. If you suspect that the solenoid is causing the clicking noise, professional help is crucial for proper diagnosis and repair.
– Starter Motor Problems: If the clicking noise is coming from the starter motor and you have ruled out other potential causes, it’s advisable to have a professional inspect and repair the starter motor. They will have the necessary tools and expertise to handle this component safely.
– Other Mechanical Problems: If you suspect that the clicking noise is not related to electrical issues but rather a mechanical problem, a professional technician can identify and fix the problem correctly. They will have the knowledge and experience to handle mechanical components without causing further damage to the golf cart.
Remember, in situations where you’re unsure or uncomfortable performing the necessary repairs yourself, it’s always better to seek professional help. They have the expertise and specialized equipment to diagnose and resolve complex issues, ensuring the proper functioning of your golf cart.
By identifying when professional intervention is necessary, you can avoid further damage and frustration, ensuring that your golf cart is back in working order as quickly as possible.
Conclusion
Finally, appropriate golf cart maintenance is essential for optimal performance and longevity. Inspecting, cleaning, and servicing regularly can prevent starting issues and clicking noises. This article’s troubleshooting guide might help you fix typical golf cart difficulties that cause clicking and not starting.
Here is a summary of the troubleshooting guide:
- Check the Battery: Ensure that the battery is fully charged and properly connected. Clean any corrosion and check for any signs of damage.
- Inspect the Solenoid: Examine the solenoid for loose or damaged connections. If necessary, clean the terminals and tighten any loose connections.
- Test the Ignition Switch: Use a multimeter to check if the ignition switch is providing power to the starter. Replace the ignition switch if it is faulty.
- Check the Starter Generator: Inspect the starter generator for any damage or loose connections. Test it using a voltmeter to ensure that it is functioning correctly. Replace the starter generator if necessary.
- Examine the Wiring: Inspect the wiring for any frayed or damaged wires. Repair or replace any faulty wiring to ensure proper electrical connections.
If these troubleshooting techniques don’t fix your golf cart’s starting mechanism, get professional help. Expert golf cart technicians can diagnose and fix complex difficulties. Professional aid has several benefits:
- Expertise: Professional technicians have specialized knowledge and training in golf cart repair. They can accurately diagnose the problem and provide effective solutions.
- Access to Tools and Equipment: Professional repair shops have access to advanced tools and equipment specifically designed for golf cart repairs. This ensures thorough and efficient repairs.
- Warranty Coverage: Many professional repair shops offer warranty coverage on their services, providing you with peace of mind and protection against future issues.
To keep your golf cart in top shape and enjoy smooth, hassle-free rides on the course, prioritize regular maintenance and seek professional aid.
Remember that golf cart maintenance is ongoing. Regularly clean the batteries, examine the connections, and look for wear and damage. Be proactive to avoid starting issues and clicking noises, ensuring your golf cart is always ready for a round.

I’m Donna Weiss, and I am the proud writer behind the captivating content you’ll find on golfneedy.com. As an avid golfer and passionate writer, I have combined my two greatest passions to bring you an incredible golfing experience. Through my articles, I aim to provide you with valuable insights, equipment reviews, and updates on the latest tournaments. Whether you’re a seasoned golfer or just starting out on this exciting journey, I am here to guide you and share my expertise. Together, let’s explore the fascinating world of golf, uncovering new techniques, and enhancing our skills. Join me on this thrilling adventure as we elevate our game and embark on an exciting golfing journey. Read More