Connect with us

Troubleshoot

How to Test Your Golf Cart Battery

Published

on

How To Test Your Golf Cart Battery

Navigating the world of golf carts can be an exhilarating ride, especially when you own one. However, before the thrill comes the nitty-gritty of maintenance; and the lifeblood of your golf cart – the battery, demands significant attention. In this post, we’re going to voyage through the art of testing a golf cart battery using practical methods, guided by data and advice from Golf Cart Resource and Northeast Battery Blog. Whether you’re giving a voltmeter or hydrometer a shot, we have researched key insights and safety tips to bring you a comprehensive guide on how to keep track of your golf cart battery’s health. Hop in, as we fine-tune your skills to keep your golf cart running at optimal performance.

Importance of testing golf cart batteries

A well-performing battery is crucial for the optimal functioning of your golf cart. Without a healthy battery, the cart might struggle to generate the needed power, or worse, leave you stranded in the middle of the course. Hence, ensuring that your golf cart battery is in good health becomes essential.

Benefits of regular battery testing

Testing your golf cart battery regularly presents you with several advantages:

1. Avoid Unforeseen Issues: Regular battery testing can help identify potential problems before they escalate, ensuring the smooth operation of your golf cart.

2. Prolong Battery Life: By keeping tabs on the health of your battery, you can maximize its lifespan and get the most out of your investment.

3. Maintain Optimal Performance: A properly functioning battery is crucial for a smooth and enjoyable golfing experience. By regularly testing the battery, you can ensure your cart is always performing at its best.

Signs of a failing golf cart battery

Certain signs can indicate a potentially failing golf cart battery. Keep a lookout for:

• Slow Start: If the cart is slow to start or shows reduced speed, it can be an indication of a battery problem.
• Dwindling Charge: If the battery doesn’t seem to hold a charge as it used to or requires frequent recharging, it may be failing.
• Physical Damage: Any visible signs of battery damage, such as bulging, leakage, or corrosion, are alarm signals that you need to address.

For more in-depth knowledge about Electric golf-cart batteries, feel free to check out this Wikipedia article.

Preparing for the battery test

How To Test Your Golf Cart Battery

How To Test Your Golf Cart Battery

Before you delve into testing your golf cart battery, you need to prepare adequately by collecting the necessary tools and equipment and putting necessary safety measures in place.

Gathering necessary tools and equipment

Here are the essential tools and equipment needed for a golf cart battery test:

•A voltmeter: You need a voltmeter to measure the voltage of your battery. An ideal voltmeter for a golf cart battery test is a digital voltmeter due to its accuracy.
•Battery cleaner: This is used to clean up any corrosion on the battery.
•Protective gear: These include gloves and safety glasses for your own personal protection during the testing process.

Safety precautions to take

Safety should always come first when dealing with golf cart batteries. Below are some safety precautions to observe:

  1. Ensure you are wearing the right protective gear: This includes gloves and safety glasses. It’s also advisable to wear old clothes as battery acid can ruin your clothing.
  2. Work in a well-ventilated area: Stagnant air can lead to hydrogen build-up which is a potential fire risk. Therefore, ensure you work in an open, well-ventilated space or work outside.
  3. Don’t smoke near batteries: Batteries can emit hydrogen which can ignite. Therefore, avoid any open flames near your workspace.

By gathering the necessary tools and ensuring you’re in the right environment for the test, you’re all set to accurately assess the health of your golf cart battery.

Conducting a voltage test

The integrity of your golf cart battery’s output is crucial in determining its overall performance. Here, we detail the steps on how to conduct a voltage test for your battery.

RELATED: How to Add Torque To Golf Cart-

Step-by-step guide for voltage testing

voltage testing

voltage testing

1. Preparation: Ensure that the golf cart is turned off. Wear necessary safety gear, like gloves and eyewear, before starting the procedure.

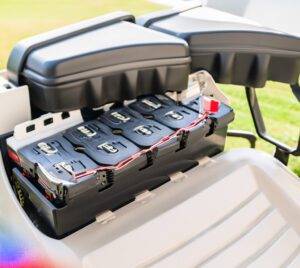
2. Access the Battery: Open the golf cart’s battery chamber to gain access to the terminals.

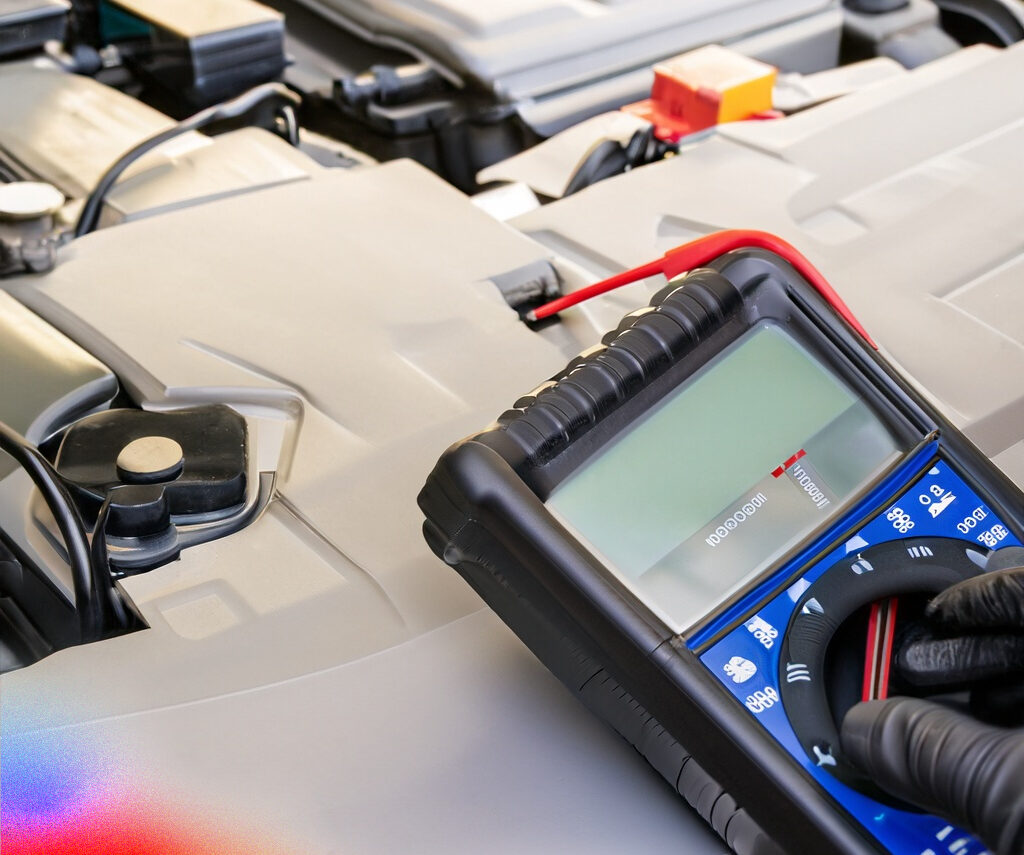
3. Connect the Multimeter: Connect the two probes of the multimeter to the battery terminals. The black probe should connect to the negative terminal while the red one goes to the positive terminal.

4. Read the Voltage: After the connection, turn the multimeter on. Set it to read voltage, typically a ‘V’ setting on the device. It will then display the battery’s voltage.

Interpreting the voltage readings

Once the reading is the display, you should be able to interpret the health status of your battery through the voltage output.

healthy 6-volt battery should ideally show a reading from 5.9 to 6.3 volts. A 12-volt battery, on the contrary, should display anywhere between 11 and 13 volts. If the readings are significantly lower than these ranges, it may be a sign that your golf cart battery is approaching the end of its life cycle or may need immediate maintenance.

For more comprehensive information on battery maintenance and troubleshooting, you can check the golf cart battery guide on Wikipedia.

Performing a load test

A load test is a good way to assess the overall health and remaining lifespan of your golf cart battery. It can also help to identify potential issues before they become critical. It’s important to perform a load test when the battery is fully charged.

Steps involved in load testing

1. Charge and Prepare: Fully charge your golf cart battery prior to the test. Once the battery is fully charged, disconnect it from the golf cart.

2. Connect Load Tester: Connect a load tester across the battery terminals. If you don’t already have one, these can be relatively affordable and are definitely beneficial for regular golf cart maintenance.

3. Load Test: Apply a load that is equivalent to half of the CCA (Cold Cranking Amps) rating of the battery. Most load testers have a switch which allows you to do this.

4. Monitor: Hold the load for around 15 seconds and carefully monitor the voltage reading.

Analyzing the load test results:

After performing the load test, interpret the results as follows:

• If the voltage drops below 9.6 volts, the battery may be weak or faulty.
• If the voltage remains above 9.6 volts, the battery is in good condition.

For more details on battery testing, please refer to this Wikipedia article on battery testing. It’s crucial to regularly test your golf cart battery to ensure its efficient functioning, which will save you from potential hassles later on.

V. Using a hydrometer for testing

Using a hydrometer for testing

Using a hydrometer for testing

One of the best ways to test your golf cart battery is using a hydrometer. A hydrometer is a simple tool that measures the specific gravity of the electrolyte solution inside each battery cell. It works on the principle that a discharged battery has a higher concentration of sulfuric acid than a charged one.

Exploring the hydrometer testing method

Testing a golf cart battery with a hydrometer involves several steps. To start with, you need to calmly and safely remove the battery cap to access each cell–you should always wear protective gear for safety.

Here’s a step-by-step guide:

  • Extract a sample of the electrolyte solution using the hydrometer.
  • Take note of the specific gravity reading on the hydrometer scale.
  • Repeat these steps for each cell in the battery.

Remember to keep the hydrometer clean between each cell to avoid contamination and inaccurate readings.

RELATED: How Do You Troubleshoot A Golf Cart Battery?

Understanding specific gravity readings

Interpreting the readings you get on the hydrometer is crucial in understanding the health of your golf cart battery. A fully charged golf cart battery should have a specific gravity of about 1.265 (at 80°F). Conversely, a completely discharged battery will typically have a specific gravity of 1.120.

Note that for each 10°F variance from the baseline temperature of 80°F, the specific gravity reading will adjust by 0.004. For example, if the temperature is 70°F, the fully charged specific gravity reading would be 1.261 (1.265-0.004).

Remember, consistency in readings across all cells is key. Large variations can indicate a defective or weak cell.

Performing a visual inspection

Before embarking on a technical review, it can be valuable to perform a simple visual inspection of the golf cart battery. The state of the battery can be a good indicator of its overall health.

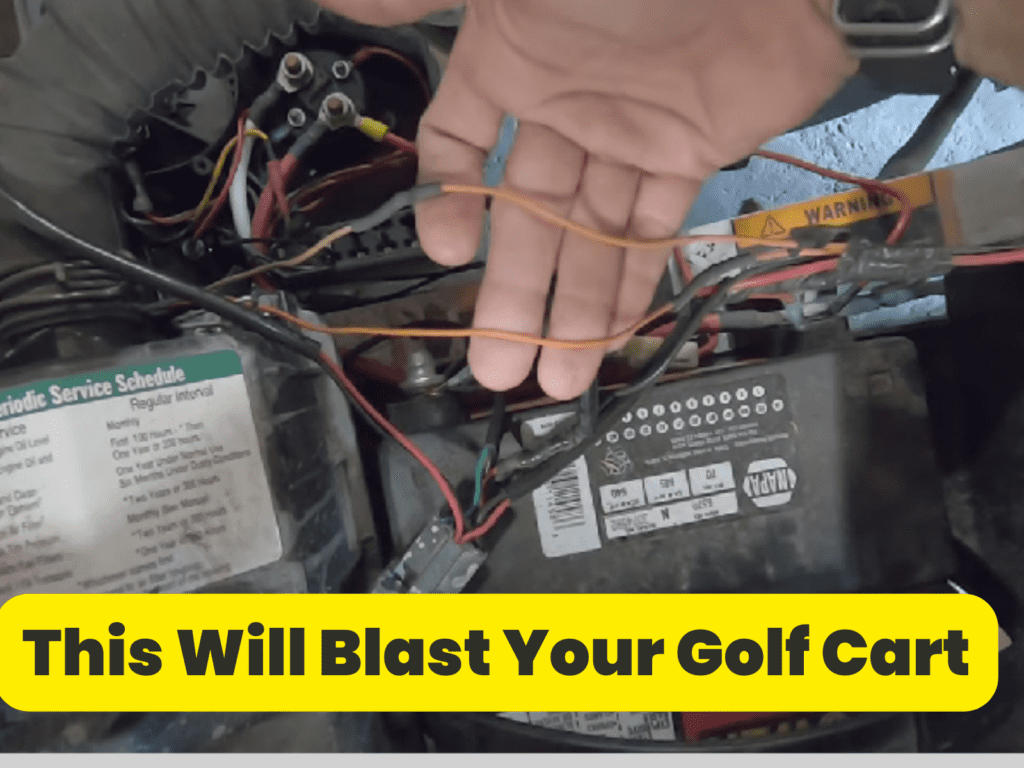
Inspecting battery terminals and connections

It is smart to begin by inspecting the battery terminals and the connections. Look for rust, corrosion or other noticeable signs of wear and tear. Poor connections can result in reduced performance and could potentially lead to more serious issues if not addressed.

  • Terminals: Examine the battery’s terminals carefully. Signs of corrosion (a bluish-white, powdery substance) can indicate a problem.
  • Cables: Make sure the cables are secured tightly to the terminals. Loose connections can lead to power loss.
  • Wiring: Check the wiring for any visible signs of damage, such as fraying or melting.

Identifying signs of battery damage or deterioration

Next, carefully review the battery itself for any signs of damage or deterioration.

  • Case: Check the battery case for any noticeable cracks or leaks. This could be an indicator of a serious problem and could lead to a complete failure.
  • Fluid Levels: The fluid level in each battery cell should be reviewed. Low fluid levels can damage the battery and affect performance. Refer to your electric vehicle battery manufacturer’s instructions on how to properly check and refill the fluid levels.
  • Age: Lastly, consider the age of your battery. Most golf cart batteries are designed to last between 4-6 years. If your battery is approaching or beyond this range, it may be time for a replacement.

Through careful visual inspection, you can identify potential issues and take necessary steps toward maintaining your golf cart battery’s health.

Testing battery capacity

Every golf cart owner needs to be aware of the state of their batteries. Golf cart batteries are not cheap, and an underperforming battery can wreak havoc on your round of golf. But how to determine the remaining capacity of your golf cart battery? Here’s a quick overview.

Methods for determining the remaining battery capacity

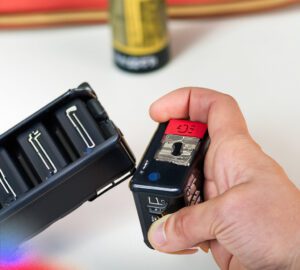
Use a multimeter: A multimeter is a straightforward and cheap way to determine if your batteries are working correctly or declining. To use a multimeter:

  • Test each battery cell individually.
  • If the reading is 2.1 volts per cell (each cell is 2.1 volts, six cells mean 12.6 volts), then the battery is in good condition.
  • If the reading is lower than 2.1 per cell, then the battery is not in good health.

Specific gravity test: This method measures the density of the battery acid in relation to pure water. For this test, you’ll need a hydrometer (gravity tester). The typical full-charge specific gravity is about 1.265.

  • If the gravity varies more than .025 in any cell, you need to equalize the battery.

Interpreting the capacity test results

After testing, you need to interpret the results:

  • If your battery passes both tests, then it’s performing well.
  • If your battery shows poor results in both tests, it’s time to consider a replacement.
  • If your battery tests good with one method and poor with another, you might want to conduct another test or consult with a battery expert to get a second opinion.

Remember, a good battery leads to a good day on the golf course. So regularly check your golf cart battery’s capacity and ensure it’s at its optimal performance.

Maintenance and care tips

Maintenance and care tips

Maintenance and care tips

When it comes to golf cart battery maintenance and prolonging its life, a little goes a long way. Here are some key tips:

Best practices for prolonging battery life

1. Regular Charging: Always recharge your golf cart battery after every use, regardless of how far you’ve traveled. Frequent recharging helps condition the battery’s life cycle and prevents ‘deep discharging’ which can damage the battery over time.

2. Water Maintenance: Check and refill the water levels of your battery regularly. Use only distilled water to refill the battery, as regular tap water contains minerals that can damage the battery cells.

3. Proper Storage: If you aren’t using your golf cart for an extended period of time, store it properly. The battery should be fully charged, clean, and stored in a dry, cool place.

RELATED: Are Electric Golf Carts More Cost-Effective Than Gas-Powered Ones

Common mistakes to avoid

Just as there are best practices, there are also common mistakes to avoid to prolong your golf cart battery’s life:

1. Avoid Overcharging: While regular charging is essential, overcharging can lead to battery damage. A good battery charger should automatically switch off once the battery is fully charged.

2. Avoid draining the battery: Never allow your golf cart battery to completely discharge. It can decrease the battery’s lifespan and lead to irreversible damage.

3. Avoid using your golf cart battery until it’s fully charged: If you start using your golf cart when the battery is half-charged or less, it can strain and overheat the battery.

By keeping these best practices and mistakes in mind, you can ensure that your golf cart battery stays healthy and lasts longer. This minimizes the need for frequent battery replacements and reduces overall maintenance costs. Stay out on the green longer by taking proper care of your golf cart battery.

Troubleshooting common battery issues

Well-maintained golf cart batteries can typically last between four to ten years. However, even the best-cared-for batteries can sometimes encounter issues. If your golf cart battery appears to be malfunctioning, here are a few common problems to keep in mind:

  1. Battery discharges too quickly: If the battery seems to discharge faster than usual, check for possible leakage or damages to the battery case. This could cause acid to leak, thus resulting in rapid discharging.
  2. Golf cart doesn’t start: If your golf cart refuses to start, it’s likely that the battery is completely depleted or damaged.
  3. Golf cart runs inconsistently: If the cart’s performance is erratic – sometimes running smoothly and other times barely moving – the battery might be failing or the connections may be loose or corroded

Addressing common problems with golf cart batteries

If you’ve identified one of these common problems above, it is not necessarily the end for your battery. You can potentially troubleshoot the issue at home with the following solutions:

  • Recharge the battery: If the battery is discharging quickly or the golf cart isn’t starting, try recharging it. This often solves the problem if the battery isn’t extremely old or damaged.
  • Check the connections: Loose or corroded connections can lead to inconsistent performance. So make sure to check all battery connections and clean them if necessary.
  • Test the battery voltage: Using a multimeter, check the voltage of your battery to find out if it’s within the right range.

Remember that if the problem persists, it’s best to consult with a professional or consider replacing the battery if it’s old or significantly damaged.

Troubleshooting tips and solutions

Always keep your protective gear on while handling batteries. For more detailed information about maintaining and troubleshooting your golf cart battery, visit this guide on Wikipedia.

Replacing or reconditioning batteries

Replacing or reconditioning batteries

Replacing or reconditioning batteries

For anyone who owns and operates a golf cart, understanding when to replace or recondition its battery is crucial. If the vehicle is not starting as reliably as it used to or feels underpowered, it’s probably time to check the condition of its batteries.

Knowing when to replace a golf cart battery

To ensure your golf cart operates optimally, you must know when it’s time to replace its battery. Here are a few signs to look out for:

• Inadequate Power: If your golf cart is not achieving the same speed as before or struggling on inclines, it might be due to a weak battery.

• Decreased Range: If your battery isn’t lasting as long as it used to per single complete charge, this is an indication that its capacity to hold a charge is diminishing.

• Age: Lastly, consider the age of your golf cart battery. Typically, depending upon usage and maintenance, a golf cart battery can last anywhere between 4-6 years. If your battery falls within this range, it may be prudent to replace it, especially if you’re noticing a decline in performance.

If you are experiencing any of these issues, consider either reconditioning your battery or replacing it completely. However, always ensure your charger is working correctly before diagnosing a battery issue. Remember, a well-maintained golf cart battery can significantly enhance the performance and longevity of your cart!

Conclusion

As this guide comes to a close, the importance of regular maintenance and testing on your golf cart battery cannot be more strongly emphasized. A well-functioning battery not only ensures optimal performance of your golf cart but also significantly extends its lifespan.

Summary of the battery testing process

Let’s quickly recap the key steps of testing your golf cart battery:

1. Preparation: Make sure the golf cart is turned off, and you have your safety equipment (gloves, goggles) on. It’s essenital to have a multimeter and hydrometer at hand.

2. Visual Inspection: Look at the overall condition of the battery. Check for any visible signs of damage, corrosion or leakage.

3. Voltage Test: Using a multimeter, measure the voltage across the battery terminals.

4. Specific Gravity Test: Using a hydrometer, test the specific gravity of each cell in the battery.

Should either the voltage or specific gravity tests yield results outside the normal range, it might be time to consider replacing your golf cart battery.

Remember, consistent monitoring and maintenance are key to prolonging the life of your battery. If you face any uncertainties or difficulties, do not hesitate to seek help from a professional. A bit of focused attention today can save you a significant amount of time, money, and inconvenience in the long run!

Happy golfing!


FAQ’s

Why should I test my golf cart battery?

Regularly testing your golf cart battery is essential to ensure its performance and longevity. By testing, you can identify potential issues early on, such as low voltage or a failing cell, allowing you to take preventive measures or replace the battery if necessary.

How often should I test my golf cart battery?

It’s recommended to test your golf cart battery at least once a month. Regular testing helps you monitor its health and detect any changes in performance over time.

What tools do I need to test my golf cart battery?

To test your golf cart battery, you’ll need a digital voltmeter or a multimeter. These tools can measure the voltage of your battery and give you an idea of its state of charge.

How do I use a voltmeter to test my golf cart battery?

To use a voltmeter, set it to the DC voltage range and connect the red (positive) probe to the positive terminal of the battery and the black (negative) probe to the negative terminal. The voltmeter will display the battery’s voltage, allowing you to determine its current charge level.

What is a healthy voltage range for a golf cart battery?

A fully charged golf cart battery typically reads around 12.6 to 12.8 volts. However, the specific voltage range may vary depending on the battery type (lead-acid, lithium-ion, etc.) and the manufacturer’s recommendations. Generally, a voltage reading below 12.0 volts indicates a low charge and may require recharging.

What Factors Of Impact Are Used In Putting?

Continue Reading
Click to comment

Leave a Reply

Your email address will not be published. Required fields are marked *

Knowledge Base

How Do I Know if My Driver is Worn Out?

Published

on

How Do I Know if My Driver is Worn Out?

If you’ve been using the same driver for a while, you may be wondering if it’s time for an upgrade. There are a few key signs that indicate your driver may be past its prime. Being aware of these signs can help you determine if your driver has become worn out and is due for replacement.

Look for visual signs of wear

Inspecting the physical condition of your driver can reveal obvious signs of wear and tear. Here are a few things to look out for:

  • Check the face of the driver for nicks and dents – Even small dings and marks on the driver face can negatively impact performance. Dented areas or rough patches can alter ball flight and reduce distance.
  • Inspect the sole for wear and tear – Dragging the sole through turf and sand over time can visibly damage the bottom surface. Heavy wear or visible cracking signals diminished performance.
  • Examine the shaft for cracking or peeling – Graphite and composite shafts can crack internally or externally. Peeling or flaking paint near the hosel also indicates that shaft integrity has been compromised.

Monitor performance changes

While physically examining your driver is important, evaluating any differences in performance provides the clearest indicator of a driver gone bad. Here’s what to monitor:

  • Notice any loss of distance – Over time, a decrease in carry distance, hang time, or ball speed usually means the driver faces and/or shaft have lost their pop.
  • Pay attention to deviation or slicing – Increased shot dispersion, slicing, or a tendency to miss left or right points to face wear affecting shot shaping and accuracy.
  • Check if your drives feel different – If the driver seems to vibrate or feel dead compared to when it was new, that’s a red flag on durability. Less feedback at impact signals power loss.

Get your driver analyzed

Advanced golf technologies make it easier than ever to precisely measure driver performance over time. Take advantage by getting a professional analysis done.

  • Use launch monitors at driving ranges – Modern monitors track club speed, ball speed, launch angle and other stats to identify any drops in driver efficiency.
  • Consult with golf professionals – Get input from a teaching pro or custom clubfitter, who can pinpoint flaws and fine-tune driver specifications.
  • Consider getting a professional club fitting – New driver technology may substantially improve results, even if your current gamer doesn’t seem fully worn out.

If you notice multiple signs of driver wear, then it’s probably time to start demoing modern driver models to find an ideal replacement. Investing in a new driver tuned to your swing can generate faster ball speeds, tighter shot dispersion, and more yards off the tee.

How to extend the life of your driver

How to extend the life of your driver

Image: Unsplash

Once you’ve purchased a new driver, you’ll want to make it last as long as possible. Here are some handy tips to help maintain peak performance and maximize your driver’s lifespan:

  • Use a driver cover – A form-fitting headcover protects the clubface from nicks, dings and surface scuffs during transport and storage.
  • Clean after every round of golf – Use a soft brush and microfiber cloth to remove dirt, grass, and debris from the driver head and shaft after each use.
  • Store driver properly when not in use – Keep your driver in a climate-controlled environment out of extreme heat, cold and humidity. Lay it horizontally to evenly distribute shaft pressure.
  • Get regular regripping – Replace worn grips at least once per season to prevent dirt, oils and humidity from degrading the shaft below the grip line.
  • Avoid using driver at the range – Limit wear and tear by teeing off with an older 3-wood or hybrid at the practice tee. Save your top driver for when it really counts.

With the right care and maintenance habits, your new driver should maintain its pop and precision for at least two full seasons before starting to show its age. Be diligent about upkeep, and you could even stretch a high-quality driver’s competitive lifespan to 5+ years. Investing in premium equipment and properly caring for your clubs pays off in the long run.

Clean after every round of golf

After playing 18 holes, it’s important to thoroughly clean your driver head and shaft to remove debris, dirt, grass stains, and other contaminants. Use a soft-bristle golf brush and microfiber cloth to gently wipe down the clubhead, sole, crown, and face. Remove stuck-on grass by rubbing gently with the brush. Pay special attention to the face grooves, clearing out any compacted dirt or grass wedged inside.

Use a damp, non-abrasive polishing cloth to wipe off dirt from the shaft. Check for grass buildup under the ferrules connecting the shaft to the hosel. Avoid excessive moisture, harsh cleaners or abrasive scouring pads during cleaning, as this can damage club surfaces.

After cleaning, dry the entire club thoroughly with a soft towel. This keeps the metal, graphite and composite materials from oxidizing or absorbing extra moisture. Storing a damp driver promotes corrosion and decomposition. A quick wipe-down after golf removes debris and perspiration that can shorten driver lifespan if left on for prolonged periods. Making driver cleaning part of your regular post-round ritual keeps the club in prime playing condition.

When to upgrade your driver

While there is no definitive lifespan for a driver, certain situations make clear it’s time for an upgrade:

Launch monitor results show distance drop

Seeing tangible data that your driver carry, ball speed and other key metrics have dropped means an optimally fit new model will likely restore those numbers.

Consistency and accuracy decrease

If you’re losing fairways and seeing increased shot dispersion with your current driver, its performance has diminished too far.

You can’t eliminate a persistent slice or hook

If your driver has developed a tendency to slice or hook that lessons and swing changes can’t fix, its worn face or shaft may be the culprit.

The driver feels and sounds different at impact

Less vibration feedback and more muted acoustics are telltale signs of a driver losing its pop. Lack of feel indicates power being sapped.

Conclusion

Detecting driver wear issues early allows you to reshaft or replace the club before too much performance is lost. Keep a close eye out for any physical blemishes, drop-off in distance or accuracy, or changes in feel and response at impact.

If your current gamer shows multiple signs of diminished returns, visit a certified club fitter to find your ideal new driver model tailored to your swing. With optimal launch conditions and forgiveness on off-center hits, you’ll overpower courses from the tee box once again.

FAQs

Q: How often should I replace my driver?

A: Most golfers should plan on buying a new driver every 3-5 years depending on usage, maintenance, and advancements in technology. Signs of wear usually become obvious by this point.

Q: Does regripping help extend driver life?

A: Yes, installing a fresh grip helps optimize grip feel and prevent dirt or moisture from degrading the shaft under the grip line. Regripping once a year is recommended.

Q: What are signs the shaft is wearing out?

A: Fading, inconsistent ball flight, vibrating on impact and peering or cracking paint near the hosel all indicate the shaft’s integrity is fading.

Q: Can I still play well with a worn driver?

A: You can compensate for some loss of performance, but once driver wear becomes severe, it will be virtually impossible to hit consistently long, straight drives.

Q: Is it better to reshaft or buy new when replacing an old driver?

A: Buying a brand new model is usually best for most golfers seeking maximum distance and forgiveness. Reshafting a worn driver offers a cheaper short-term fix.

Continue Reading

Golf Putter

How To Shorten Putter Shaft?

Published

on

How To Shorten Putter Shaft?

Ladies and gentlemen, join us as we delve into the art of shortening a putter shaft. Today, we’ll equip you with the knowledge and tools needed to master this precise technique. With our step-by-step guidance, you’ll learn how to secure your putter, remove the grip, and expertly cut down the shaft. We’ll even show you how to Shorten Putter Shaft.

Get ready to elevate your putting game with our comprehensive guide.

Key Takeaways

  • Putter shaft length affects swing weight and overall feel of the club.
  • Shorter shafts provide better control and consistency in stroke.
  • Longer shafts generate more power and distance but sacrifice control.
  • Finding the right balance of shaft length is crucial for optimal performance.

Understanding the Importance of Putter Shaft Length

As golfers, we understand the importance of having the correct putter shaft length for optimal performance on the greens.

The shaft length of a putter directly affects the swing weight and overall feel of the club.

A shorter shaft can provide better control and consistency in your stroke, allowing for more accurate putts.

On the other hand, a longer shaft can generate more power and distance, but it may sacrifice control.

It’s crucial to find the right balance that suits your playing style and preferences.

When considering the putter shaft length, it’s also important to take into account your height, posture, and grip style.

Why shorten putter shafts and the benefits

Perfect Fit: You know that one-size-fits-all rule? It doesn’t exist in golfing! Each player’s physical attributes and putting style are unique. Therefore, ensuring your putter shaft is the right length for you becomes vital. Shortening your putter shaft to match your stature and game style could significantly enhance your performance on the green.

Comfort: Cramping up your style because of a too-long shaft? Say no more. Shortening your shaft provides a more comfortable grip, leading to better control and a smoother stroke. This way, you can focus more on the line, speed, and other integral aspects of your shot.

Consistency: How about more consistent strikes? Not a bad prospect, right? Shorter putter shafts allow for a better alignment and a more stable stroke, which often means consistent ball contact and more predictable outcomes.

Accuracy: With improved control and consistency comes higher accuracy while aiming and putting. After all, finding the cup with fewer strokes is the name of the game.

Confidence: Perhaps, a less intuitive yet significant advantage of a fitting putter shaft is an enhanced confidence level. When you know your gear fits perfectly, it gives you that little extra psychological edge going head-to-head with your golf buddies or the course itself.

Here is a handy table summarizing these benefits:

Benefit Explanation
Perfect Fit Shortened shaft could improve your performance by adjusting to your stature and game style.
Comfort Reduced shaft length allows for a more comfortable grip and control.
Consistency Better alignment and more stable strokes lead to consistent ball contact.
Accuracy Improved control and consistency contribute to higher accuracy.
Confidence Perfectly fitting gear boosts your confidence level.


Tools and Materials Needed

how to change the grip on a golf putter

You’re excited about the prospect of improving your golf game, but your putter’s shaft is just too long. Don’t worry, friend! Shortening it is relatively straightforward, and with the right tools and guidance, you’ll have a custom-sized putter in no time! And guess what, you get to do it all by yourself, giving that personal touch to your equipment.

List of tools and materials required for the process

You will need certain tools and materials, luckily, most of them are probably there in your garage. If not, a quick trip to your local hardware store will set you up.

  1. Tape Measure: To accurately measure your putter’s current length, and to mark where you may need to cut it.
  2. Hacksaw or Pipe Cutter: For the actual trimming process. A pipe cutter would ensure a cleaner cut.
  3. Sandpaper: To smooth the cut edge and protect your hand from any sharp edges.
  4. Masking Tape: To prevent potential splintering and to secure the grip while it dries.
  5. Grip Solvent and Double-sided Tape: To install the putter grip.


Tool Description Usage
Putter Head The weighted end of the putter Must be removed before shortening the shaft
Shaft The long, slender part of the putter Needs to be shortened to desired length
Metal Pipe Cutter A tool designed to cut metal pipes Used to cut the shaft to the desired length

Using a metal pipe cutter is the most precise way to shorten a putter shaft. It ensures a clean and accurate cut without damaging the shaft’s integrity. Before starting, remove the putter head from the shaft. Secure the shaft in the metal pipe cutter and tighten it. Slowly rotate the cutter around the shaft, applying gentle pressure until it cuts through. Measure and mark the desired length beforehand to ensure accuracy. Remember to wear protective gloves and eyewear during the process. With the right tools and careful execution, you can successfully shorten your putter shaft to your desired length.

Adjusting Putter Length

No more worrying about awkward stances and uncomfortable swings. Shortening your putter shaft is a straightforward process that you’ll learn in a cinch. With the right tools and a bit of patience, you’ll have an adjusted putter in no time.

Tips and techniques on finding the optimal length for your putter

Finding the right length:  Grab your putter and stand in your golf stance. Your eyes should directly line up with the ball, and your hands should be directly beneath your shoulders. If your putter length doesn’t allow for this posture, it’s not the right size for you!

Choosing the correct equipment:  To shorten your putter shaft, you’ll need a hacksaw, a mallet, a vice, a measuring tape, and new grip for the handle.

Measuring and cutting the shaft:  Once you’ve decided on the correct length, use the measuring tape to mark where you want to cut. Secure the putter in the vice and use the hacksaw to gently saw through the shaft at the marked area.

Putting on the new grip:  After cutting the shaft, you’ll need to put on a new grip. Apply double-sided tape, peel the backing off, and add grip solvent. Finally, slip the new grip onto the shaft and let it sit overnight.

So there you have it! It’s time to show off that improved swing. The golf course better be ready for you and your tailored putter! And remember, gaining mastery takes practice, so don’t give up. A perfect putt is just a swing away! Now, go out there, shorten that putter shaft, and start sinking putts like never before! You’ve got this!


Preparatory Steps: Safely Securing Your Putter

How To Shorten Putter Shaft?

How To Shorten Putter Shaft?

We need to ensure that our putter is safely secured before beginning the process. This is crucial to prevent any accidents or damage to the club. Here are some preparatory steps to follow:

  • Cutting tool: Use a high-quality cutting tool to ensure a clean and precise cut. This will help maintain the integrity of the putter shaft.
  • Grip down: Before cutting, mark the desired length on the shaft using a measuring tape. Then, grip down on the shaft to prevent any slippage during the cutting process.
  • Vice: Secure the putter shaft in a vice to provide stability and support. This will allow for a controlled cut and minimize the risk of any mishaps.

Removing the Grip: A Detailed Guide

After securely fastening the putter in a vice, we can begin removing the grip by using a utility knife to carefully cut along the length of the grip. This process requires precision and attention to detail in order to avoid damaging the shaft or grip. Here is a detailed guide on how to remove the grip from your putter:

Steps Description
Step 1 Securely fasten the putter in a vice to provide stability during the process.
Step 2 Use a utility knife to make a shallow cut along the length of the grip. Be careful not to cut into the shaft.
Step 3 Slowly peel back the grip, applying gentle pressure to separate it from the shaft. Work your way around the entire grip until it is fully removed.
Step 4 Clean any residue left on the shaft using a solvent or grip tape remover.
Step 5 Once the grip is removed, you can proceed to cutting down the shaft to your desired length.

With the grip successfully removed, we can now move on to the next step: cutting down the shaft.

Cutting Down The Shaft: Techniques and Tips

Now that the grip has been removed, let’s discuss different techniques and tips for cutting down the length of the shaft. Shortening the shaft of a putter can greatly improve your game by allowing for better control and accuracy. Here are some techniques and tips to consider:

  • Measure twice, cut once: Before making any cuts, carefully measure the desired length of the putter shaft. Remember to take into account your height, stance, and personal preference.
  • Use a cutting tool: Invest in a high-quality cutting tool specifically designed for golf club shafts. A rotary tool with a cutting wheel is a popular choice. Be sure to follow the manufacturer’s instructions for safe and precise cutting.
  • Smooth the edges: After cutting down the shaft, use sandpaper or a file to smooth out any rough edges. This will ensure a comfortable grip and prevent any potential injuries.

Dealing With Graphite Shafts: A Special Case

Be aware of graphite shafts’ distinctive traits and how they differ from conventional shafts. Graphite shafts are lightweight and flexible, improving golf club performance. Shortening a graphite shaft requires some careful considerations. First, get a DIY utility knife and a solvent to remove the old grip. Second, cut the shaft carefully since graphite might splinter. Finally, consider your putter length and cut precisely. Following these steps, you may shorten a graphite shaft and improve your golfing experience.

DIY Tools Safety Tips Step-by-Step Expert Tip
Utility knife Use protective eyewear Measure and mark desired length Apply a small amount of solvent to ease grip removal
Solvent Cut slowly and evenly Secure the shaft before cutting Sand the cut edge for a smooth finish
Handle graphite with care Clean and dry the shaft after cutting Consider using a shaft extension if needed

Now that you are familiar with the unique characteristics of graphite shafts, let’s move on to the next step: installing the new grip.

Installing the New Grip: Step-by-step Procedure

How To Shorten Putter Shaft?

To begin installing the new grip, we carefully slide it onto the end of the graphite. Ensuring a secure fit is essential for optimal performance and control. Here is a step-by-step procedure to guide you through the process:

  1. Remove the old grip: Using a grip removal tool or a utility knife, carefully cut and peel off the old grip, being cautious not to damage the shaft.
  2. Measure and mark: Determine the desired length of the shortened putter shaft. Use a measuring tape or ruler to mark the new length on the shaft, ensuring accuracy.
  3. Cut and reattach: Using a hacksaw or a pipe cutter, carefully cut the shaft at the marked point. Once cut, remove any burrs or sharp edges. Reattach the grip onto the newly shortened shaft, ensuring it’s aligned properly.

By following this step-by-step procedure, you can confidently install a new grip and shorten your putter shaft to suit your preferences and improve your putting game.

Remember to take your time and maintain precision throughout the process.

Testing and Fine-Tuning

Hooraay! You’ve successfully shortened your putter shaft! It’s an electrifying experience, isn’t it? But the fun doesn’t stop here. Now, it’s time to test your new weapon on the playful battleground – the green!

Methods to assess the newly shortened putter and make necessary adjustments

  1. Hit the Green:  Your first sentinel check should be a real, golf-playing experience. Head on to your favorite golf course and get a feel of your rejuvenated putter. Don’t forget to watch out for any changes in the stroke and how the ball reacts!
  2. Check Your Comfort: Comfort is everything in golf! Take note if your posture feels more natural while aligning the putt. If it doesn’t, don’t lose hope. All you have to do is make few adjustments until you find your sweet spot.
  3. Fine Tuning: If you’re feeling a little out of sync with your new putter, don’t worry! Look for the cause – is it too short? Too light? You can add weight to the putter head or even revert the changes by adding an extension to your putter shaft.
  4. Remember Practice: Practice makes perfect! Remember, change is hard at first but keep practicing until it feels perfect. Remember the joy of this process, it is all meant to refine your game and make it more enjoyable.

Here’s a friendly table summarizing your post-putter-shortening journey:

Step Explanation
Hit the Green Play live and observe the changes in stroke and ball reaction.
Check Comfort Ensure your posture feels natural with the new putter length. Make adjustments as necessary.
Fine Tuning Add weight or lengthen if necessary.
Practice Perfect your stroke with the newly adjusted putter through regular practice.

Keep your spirits high and your strokes low! Your freshly tailored putter is set to be your winning secret in your next round of golf.

Checking Balance and Swing: Post-adjustment Measures

After adjusting the grip, evaluate the golf club’s balance and swing for best performance.

Balance requires uniform weight distribution throughout the club. We can check this by balancing the club on our finger below the grip. If it tilts, we can balance it by adding weight to the other end.

Next, evaluate swing weight points. These are weight distribution along the club. A swing weight scale can quantify this. Adjusting weight distribution can improve our swing feel and golf play.

Troubleshooting: How to Overcome Common Problems

How To Shorten Putter Shaft?

When it comes to shortening a putter shaft, it’s not uncommon to encounter some common problems along the way. But fear not, as we’re here to guide you through troubleshooting and overcoming these hurdles.

One common issue is a tight or stuck nut that makes it difficult to loosen and adjust the shaft to the desired length. In such cases, using a wrench or pliers with a good grip can help loosen the nut.

Another problem you may face is accidentally cutting the shaft shorter than the desired length. To avoid this, it’s crucial to measure and mark the desired length accurately before making any cuts.

Lastly, be mindful of the overall balance and weight distribution of your putter after the shaft has been shortened, as it can affect your swing.

With these troubleshooting tips in mind, let’s move on to the subsequent section where we’ll discuss maintenance tips for your shortened putter shaft.

Maintenance Tips for Your Shortened Putter Shaft

As we maintain a shortened putter shaft, it’s important to regularly clean and inspect it for any signs of damage or wear. Proper maintenance ensures optimal performance and longevity of your club.

To keep your shortened putter shaft in top condition, here are some essential maintenance tips.

Firstly, after each round, wipe down the shaft with a clean, damp cloth to remove any dirt or debris. Pay close attention to the grip area and make sure it’s free from any residue.

Secondly, inspect the shaft for any cracks, dents, or signs of wear. If you notice any damage, it’s crucial to address it promptly to prevent further issues.

Finally, consider using a protective headcover to safeguard the shaft during transportation and storage.

Conclusion -How To Shorten Putter Shaft?

By now, you must be thrilled about having successfully learned and applied the knowledge of how to shorten a putter shaft. This isn’t just another technical skill to boast about, oh no! It goes beyond that. It’s a skill that caters to your comfort, enhances your control over your club speed, and ultimately improves your putting game. And the best part? You did it yourself!

Recap of the process and its benefits

Remember when you embarked on this adventure, both excited and a tad nervous? The journey began with understanding your requirements – how short you needed the club to be. Then came the technical stuff – removing the old grip, cutting down the club shaft – not forgetting safety procedures, of course!

You then corked up the club shaft, reinstalled the grip, and voila! You were done. A shorter putter shaft, crafted with commitment and customized to perfection. All of it seemed daunting at first, but you soared through it like a champ!

But what’s the beauty of successfully shortening a putter shaft? It’s to allow for a comfortable posture and a more natural stroke. By unlocking exceptional control over speed and enhanced accuracy, you’re doing wonders to your putting game.

Just as you savored the sweet achievement of DIY cutting down your putter shaft, it’s essential to remember the benefits of this exercise.

  1. Perfect Fit: A shortened putter shaft aligns your eyes directly over the ball, enabling an excellent putting stance. Unlock the joy of a perfect fit!
  2. Improved Accuracy: With a comfortable posture comes better precision. Yes, you were not just wielding a cutter, but also cutting down unnecessary strokes from your game!
  3. Better Control: Controlling your club speed becomes more natural with a putter shaft tailored to your perfect fit. Savour the thrills of enhanced control!

Few things are as rewarding as watching your golf game improve through an exercise of DIY passion! So the next time you hold your putter, remember, it’s not just a golf club anymore. It’s your ticket to a better game, and you created it! Cheers to many game wins with your customized, shortened putter shaft!

Frequently Asked Questions

How Do I Know if I Need to Shorten My Putter Shaft?

If we’re wondering if we need to shorten our putter shaft, it’s important to assess our putting technique. Factors such as posture, alignment, and stroke consistency can indicate whether a shorter shaft would improve our performance.

Can I Use Any Type of Saw to Cut Down the Shaft?

Yes, any type of saw can be used to cut down the shaft of a putter. However, it is important to use caution and precision to ensure a clean cut and avoid damaging the shaft.

What Are the Potential Risks of Shortening a Putter Shaft?

Shortening a putter shaft can have potential risks. It may affect the balance and weight distribution, leading to changes in performance and feel. It’s important to consider these factors before making any modifications.

How Much Should I Shorten the Putter Shaft By?

To determine how much to shorten a putter shaft, it’s important to consider factors like your height, posture, and grip. Consulting with a professional or experimenting with small adjustments can help find the optimal length for your stroke.

Can I Shorten a Putter Shaft Made of Graphite?

Yes, you can shorten a graphite putter shaft. However, it requires caution and expertise to avoid damaging the shaft. Seek professional assistance or follow a detailed guide to ensure a successful modification.


Continue Reading

Troubleshoot

How to Fix a Golf Umbrella with a Hole

Published

on

Fix a Golf Umbrella with a Hole

Imagine this scenario: you’re out on the golf course, enjoying a lovely round of golf, when suddenly you notice a small hole in your trusty golf umbrella. The rain starts to pour, and you find yourself in a predicament. But fear not! In this article, we will show you a simple and effective method to fix a golf umbrella with a hole. Say goodbye to raindrops falling through and hello to staying dry throughout your game. So grab that umbrella and let’s get started on this quick DIY fix!

How to Fix a Golf Umbrella with a Hole

Golf umbrellas are a must-have accessory for golfers, providing protection from both rain and sun while out on the course. However, over time, it’s not uncommon for these umbrellas to develop holes, compromising their effectiveness. If you find yourself with a golf umbrella that has a hole in it, don’t worry! There are several steps you can take to fix it and extend its lifespan. In this comprehensive guide, we will walk you through the process of assessing the damage, temporary fixes for small holes, repairing large holes, fixing broken umbrella frame parts, reinforcing the umbrella for future protection, preventive maintenance, seeking professional repair services, and considering umbrella replacement.

Assess the Extent of the Damage

How to Fix a Golf Umbrella with a Hole

Before diving into the repair process, it’s essential to assess the extent of the damage on your golf umbrella. This will help you determine the most appropriate course of action. There are two key aspects to consider during this assessment.

1.1 Identify the Size and Location of the Hole

Start by carefully examining the umbrella fabric to identify the size and location of the hole. Small holes are relatively easy to fix using temporary solutions, while larger holes may require more extensive repairs or even the replacement of the fabric.

1.2 Inspect the Umbrella Frame for any Bent or Broken Parts

In addition to the umbrella fabric, it’s crucial to inspect the umbrella frame for any bent or broken parts. Often, when the umbrella is subjected to strong winds or excessive force, the frame can become damaged. Identifying and addressing these issues early on will ensure the umbrella functions properly once the fabric is fixed.

Temporary Fixes for Small Holes

If the hole in your golf umbrella is relatively small, you may be able to apply a temporary fix to get you through a round of golf or an outing. Here are a few temporary fixes you can try:

2.1 Cover the Hole with Duct Tape or Electrical Tape

One quick and easy way to temporarily fix a small hole in your golf umbrella is by covering it with duct tape or electrical tape. Make sure the affected area is clean and dry before applying the tape. Press the tape firmly onto the hole, ensuring it covers the entire damaged area. This fix should keep the rain out and allow you to continue using the umbrella until a more permanent solution is implemented.

2.2 Apply a Waterproof Patch on the Hole

Another option for temporarily fixing a small hole is to apply a waterproof patch. You can find adhesive patches specifically designed for repairing umbrella fabric at most outdoor or hardware stores. Follow the manufacturer’s instructions to apply the patch over the hole, ensuring it adheres securely. This temporary fix should provide a watertight seal, allowing you to use the umbrella until a more permanent repair can be made.

2.3 Use a Waterproof Sealant to Fill the Hole

If you prefer a more discreet fix, you can consider using a waterproof sealant to fill the hole. Choose a clear sealant that is specifically designed for use on fabric. Apply a small amount of the sealant to the hole, ensuring it covers the damaged area and creates a waterproof barrier. Allow the sealant to dry completely before using the umbrella. This temporary solution will effectively plug the hole and prevent water from entering.

Repairing Large Holes

For larger holes in your golf umbrella, temporary fixes may not provide sufficient coverage. In these cases, it’s best to undertake more substantial repairs to ensure the umbrella functions optimally. Here’s how you can repair larger holes:

3.1 Clean and Dry the Umbrella Fabric

Before attempting any repairs on the larger hole, make sure to clean and dry the umbrella fabric thoroughly. Use a mild soap and water solution to clean the affected area, gently scrubbing with a soft brush. Rinse off any soap residue and allow the fabric to air dry completely before proceeding to the next step.

3.2 Use an Iron-On Patch to Cover the Hole

Iron-on patches are an excellent option for repairing larger holes in golf umbrella fabric. These patches can be found in various colors and are specifically designed for fabric repairs. Choose a patch that closely matches the color of your umbrella fabric. Place the patch over the hole and carefully follow the manufacturer’s instructions to apply it using an iron. This method creates a durable, permanent repair that will blend seamlessly with the rest of the fabric.

3.3 Apply a Fabric Glue to Seal the Edges of the Patch

To ensure a strong bond and prevent any fraying, it’s essential to apply fabric glue to the edges of the patch. Use a small brush or applicator to carefully apply the glue along the perimeter of the patch. Press the edges firmly together, ensuring they are securely bonded. Allow the glue to dry completely before using the umbrella. This step will provide added reinforcement and ensure a long-lasting, effective repair.

How to Fix a Golf Umbrella with a Hole

 Fixing Broken Umbrella Frame Parts

In addition to repairing the umbrella fabric, you may also encounter broken parts in the umbrella frame. Fixing these parts is vital for the umbrella’s overall functionality. Here’s how you can address broken umbrella frame parts:

4.1 Identify the Broken Part and Its Replacement

Start by identifying the broken part in your umbrella frame. This often includes spokes, ribs, or the central pole. Consult the manufacturer’s instructions or seek assistance from a professional to determine the exact replacement part needed for your specific umbrella model.

4.2 Disassemble the Frame and Remove the Broken Part

Once you have the replacement part, carefully disassemble the umbrella frame, paying attention to how each piece connects. Remove the broken part by unscrewing or unclipping it from the frame. Take note of the assembly order and keep all the other parts organized to ensure a smooth reassembly process.

4.3 Install the Replacement Part and Reassemble the Frame

With the broken part removed, install the replacement part into the umbrella frame, following the reverse steps of the disassembly process. Ensure all connections are secure and tighten any screws or clips as necessary. Take your time to ensure proper alignment and functionality before fully reassembling the umbrella. Once complete, test the umbrella to ensure all frame parts are working correctly.

Reinforcing the Umbrella for Future Protection

To prevent future damage and extend the lifespan of your repaired golf umbrella, it’s essential to reinforce it against potential wear and tear. Here are some steps you can take to strengthen your umbrella:

5.1 Apply a Waterproof Spray on the Umbrella Fabric

One effective way to reinforce your golf umbrella is by applying a waterproof spray to the fabric. These sprays create an additional layer of protection that enhances the umbrella’s resistance to water and other elements. Follow the manufacturer’s instructions to evenly coat the fabric with the waterproof spray, paying extra attention to the seams and stress points.

5.2 Add Reinforcement Patches on Stress Points

Stress points, such as where the umbrella fabric attaches to the frame, are prone to higher levels of strain and wear. To reinforce these areas, you can add adhesive reinforcement patches. These patches are specifically designed to provide extra strength and durability to the fabric, reducing the risk of future holes or tears. Simply apply the patches to the stress points according to the manufacturer’s instructions.

5.3 Consider Using a Durable Umbrella Cover

Investing in a durable umbrella cover is another way to reinforce your golf umbrella’s protection. These covers are designed to encase the umbrella when not in use, shielding it from the elements, and preventing damage. Look for a cover made from waterproof and durable materials. Remember to always store your umbrella with the fabric fully dry before placing it in the cover to prevent mold or mildew growth.

How to Fix a Golf Umbrella with a Hole

Preventive Maintenance for Golf Umbrellas

To ensure your golf umbrella remains in good condition for as long as possible, practicing regular preventive maintenance is crucial. By following these simple steps, you can extend the lifespan of your umbrella:

6.1 Always Dry the Umbrella before Storing

After each use, make it a habit to thoroughly dry your golf umbrella before storing it away. Water, especially when trapped in the folds of the fabric, can lead to mold or mildew growth and cause further damage to the umbrella. Open the umbrella fully and allow it to air dry in a well-ventilated area before closing and storing it.

6.2 Avoid Excessive Force or Windy Conditions

Golf umbrellas are designed to withstand moderate wind conditions, but subjecting them to excessive force or strong gusts can increase the risk of damage. Be mindful of windy conditions and avoid forcefully opening, closing, or using the umbrella in situations where it could be susceptible to damage. If the wind becomes too strong, consider seeking shelter and closing the umbrella temporarily until conditions improve.

6.3 Regularly Inspect for Any Signs of Wear or Damage

Make it a habit to regularly inspect your golf umbrella for any signs of wear or damage. Check the fabric for holes, tears, or fraying edges, and examine the frame for any bent, broken, or loose parts. By catching these issues early on, you can address them promptly, preventing further damage and costly repairs.

DIY Fixes

Option 1: Patching the hole with adhesive tape

If you notice a small hole in your golf umbrella, you can easily fix it by using adhesive tape. Here’s how:

  1. Clean the area around the hole: Before applying the tape, make sure the area surrounding the hole is clean and dry. This will ensure better adhesion.
  2. Cut a piece of adhesive tape: Measure the size of the hole and cut a piece of adhesive tape slightly larger than the hole to fully cover it.
  3. Apply the tape: Carefully place the adhesive tape over the hole, pressing firmly to ensure it sticks securely. Smooth out any wrinkles or air bubbles.
  4. Trim the excess tape: Use scissors to trim any excess tape around the edges. This will give your umbrella a neat and finished look.

Option 2: Using a waterproof sealant or glue

For larger holes or tears in your golf umbrella, using a waterproof sealant or glue can provide a more long-lasting fix. Here’s what you need to do:

  1. Clean the area: Just like with adhesive tape, start by cleaning the area around the hole or tear.
  2. Apply the waterproof sealant or glue: Follow the instructions on the product to apply the sealant or glue over the damaged area. Make sure you cover the hole completely and create a watertight seal.
  3. Allow it to dry: Let the sealant or glue dry completely as per the manufacturer’s instructions. This may take anywhere from a few hours to overnight.
  4. Test for water resistance: Once the sealant or glue is dry, test your repaired umbrella by spraying some water over the repaired area. If it remains watertight, you’re good to go.

Option 3: Sewing a patch over the hole

If you have basic sewing skills, you can sew a patch over the hole in your golf umbrella. Here are the steps:

  1. Choose a patch material: Select a waterproof fabric patch that matches the color or design of your umbrella.
  2. Prepare the patch: Cut the patch material into a shape slightly larger than the hole or tear.
  3. Position the patch: Place the patch over the hole, ensuring it covers the entire damaged area.
  4. Sew the patch: Using a needle and thread, sew around the edges of the patch, securing it to the umbrella fabric. Make sure your stitches are tight and close together for added durability.

By following these DIY fixes, you can extend the life of your golf umbrella by repairing small holes or tears. Remember, prevention is always better, so try to avoid situations that may cause damage to your umbrella and keep it in good condition.

Seeking Professional Repair Services

If you find yourself unable to repair your golf umbrella on your own or if the damage is extensive, seeking professional repair services is a viable option. Here’s what you should do:

7.1 Research and Choose a Reputable Umbrella Repair Shop

Begin by researching and choosing a reputable umbrella repair shop in your area. Look for reviews or ask for recommendations from fellow golfers or umbrella owners. A trusted repair shop will have the expertise and experience to handle various umbrella repairs and provide you with reliable service.

7.2 Describe the Issue and Inquire about Available Services

Contact the repair shop and describe the issue with your golf umbrella in detail. Inquire about their available services, including fabric repairs, frame replacements, and reinforcement options. Take note of any specific instructions they provide for submitting your umbrella for repair.

7.3 Follow the Repair Shop’s Instructions and Recommendations

Once you’ve chosen a repair shop and received their instructions, carefully follow their guidelines for submitting your golf umbrella for repair. Ensure your umbrella is cleaned, dried, and packaged securely before sending it in. Be prepared to provide any necessary information or details about the damage when requested.

How to Fix a Golf Umbrella with a Hole

Considering Umbrella Replacement

While repairing your golf umbrella is often the most cost-effective solution, there may come a time when replacement is the more practical choice. Consider the following factors when deciding whether to repair or replace your umbrella:

8.1 Evaluate the Overall Condition of the Umbrella

Assess the overall condition of your golf umbrella, taking into account the frequency of repairs, the age of the umbrella, and its general wear and tear. If the umbrella has undergone numerous repairs or if multiple parts are failing, it may be a sign that it’s time for a replacement.

8.2 Determine Cost-effectiveness of Repair vs. Replacement

Compare the cost of repairs to the potential investment in a new golf umbrella. If the repairs required are extensive and costly, it may be more cost-effective to purchase a new umbrella that offers improved features and durability. However, if the repairs are minimal and the umbrella still has significant life left, opting for repair might be the more economical choice.

8.3 Explore New Umbrella Options and Features

Take the opportunity to explore new golf umbrella options and features available in the market. Advances in technology and design may offer improved functionality, durability, and convenience. Consider your needs and preferences, and research different models to find an umbrella that suits you best.

Preventing Future Damage

Proper care and maintenance tips

Taking proper care of your golf umbrella is crucial to prevent any future damage. Here are some tips to keep your umbrella in excellent condition:

  1. Keep it clean: Regularly clean your umbrella by wiping away any dirt or debris. Use a mild soap and water solution for stubborn stains. Avoid using harsh chemicals as they can damage the fabric.
  2. Allow it to dry: After using your umbrella in the rain, make sure to let it dry completely before storing it. Moisture can lead to mold and mildew, causing further damage.
  3. Store it properly: When not in use, store your golf umbrella in a dry and cool place. Avoid leaving it in direct sunlight or extreme temperatures, as it can cause the fabric to fade or deteriorate.
  4. Handle it with care: Be gentle when opening and closing your umbrella to avoid any unnecessary strain on the frame. Avoid shaking your umbrella vigorously to prevent additional damage.

Investing in a quality golf umbrella

Sometimes, damage to your golf umbrella may be unavoidable. If you find a hole in your umbrella, here’s how you can fix it:

  1. Assess the damage: Determine the size and location of the hole. If it’s a small hole, you may be able to repair it yourself.
  2. Use a repair kit: You can find umbrella repair kits online or at your local outdoor supply store. These kits typically include a patch that you can apply to the hole, along with adhesive or a sewing needle and thread.
  3. Apply the patch: For small holes, apply the adhesive patch over the damaged area. Press it firmly to ensure proper adhesion. If you are using a sewing needle and thread, carefully stitch the hole closed.
  4. Consider professional repair: If the hole is too large or if you’re unsure about fixing it yourself, consider taking your umbrella to a professional repair service. They have the expertise and tools to repair your umbrella effectively.

By following these preventative measures and investing in a quality golf umbrella, you can prolong its lifespan and minimize the risk of future damage. Remember to take care of your umbrella, and it will continue to shelter you from the elements on the golf course or any outdoor activity.

Conclusion

Fixing a golf umbrella with a hole is a task that can be tackled with a little knowledge and effort. By assessing the extent of the damage, employing temporary fixes for small holes, repairing larger holes, fixing broken frame parts, reinforcing the umbrella for future protection, practicing preventive maintenance, seeking professional repair services when needed, and considering umbrella replacement when appropriate, you can revive your golf umbrella and extend its lifespan. Remember, a well-maintained golf umbrella will provide you with reliable protection on the golf course for many rounds to come. So, grab your tools and get ready to take on the task of fixing your golf umbrella with confidence!

Continue Reading

Trending