
When it comes to golf carts, the battery is a crucial component that powers the vehicle and ensures smooth operation on the golf course. Golf cart batteries are designed to provide the necessary energy for the cart’s motor to function efficiently. However, like any other battery, golf cart batteries can encounter issues that may require troubleshooting. In this section, we will explore the importance of golf cart batteries and common problems faced by users.
Why it is important to Diagnose golf cart batteries?
Sure! Below is the information you provided presented in a table format:
| Reason | Importance |
|---|---|
| Optimal Performance | A properly diagnosed battery ensures that your golf cart performs at its best. By identifying any issues early on, you can avoid sudden breakdowns or lackluster performance during your golfing adventures. |
| Longevity | Regular diagnosis helps extend the life of your golf cart battery. By catching and addressing any problems promptly, you can ensure that the battery operates efficiently, which, in turn, increases its lifespan. |
| Cost Savings | Diagnosing your golf cart battery can save you money in the long run. Identifying and fixing small issues early on can prevent major failures that require expensive repairs or even battery replacement. It’s more cost-effective to regularly monitor and maintain your battery’s health. |
| Safety | Ensuring that your golf cart battery is in good condition is essential for your safety and the safety of others. Faulty batteries can lead to sudden failures or even cause accidents. By diagnosing your batteries, you can avoid potential hazards and ensure a secure and worry-free golfing experience. |
| Consistent Performance | Golfers rely on their golf carts for consistent performance throughout a game or tournament. Diagnosing the battery regularly helps maintain a consistent power output and enables uninterrupted rounds on the course. |
How to Diagnose and Troubleshoot Golf Cart Battery Issues in 10 Steps
Golf carts are a great way to get around the golf course or your neighborhood, but battery issues can put a damper on their performance. If you’re experiencing problems with your golf cart battery, don’t worry! With some simple steps, you can diagnose and troubleshoot the issue yourself. Here’s a guide to help you get started:
- Check the battery connections: Make sure the battery cables are securely connected to the terminals. Loose or corroded connections can prevent proper power flow.
- Inspect the battery terminals: Look for any signs of corrosion, such as a white or greenish substance on the terminals. If corrosion is present, clean it off using a mixture of baking soda and water.
- Test the battery voltage: Use a voltmeter or multimeter to measure the voltage of each battery. A fully charged 12-volt battery should read around 12.7-12.8 volts. If the voltage is significantly lower, it may indicate a weak or dead battery.
- Load test the batteries: A load test can determine the battery’s ability to deliver power under a heavy load. If you don’t have the necessary equipment, take the batteries to a professional for testing.
- Inspect the battery casing: Look for any cracks or leaks in the battery casing. Damaged batteries should be replaced immediately.
- Check the water levels: If you have flooded lead-acid batteries, ensure that the water levels are topped up. Use distilled water and fill each cell just enough to cover the plates, but not above the maximum fill line.
- Clean the battery: Regularly clean the battery and its surrounding area to prevent dirt and debris from causing a poor connection. Use a mixture of baking soda and water to clean the terminals and cables.
- Inspect the battery charger: Make sure the charger is plugged in correctly and functioning properly. Check the charging cables and connections for any damage.
- Examine the battery charger output: Use a voltmeter to measure the voltage output of the charger. It should be within the recommended range specified by the manufacturer.
- Monitor battery usage: Keep track of how often you charge your batteries and how long they last. This can help identify any patterns or issues with the battery’s performance.
RELATED: What Is The Average Lifespan of a Golf Cart Battery?
Remember, if you’re unsure about any steps or feel uncomfortable working with batteries, it’s always best to seek professional assistance. By following these steps, you can diagnose and troubleshoot the most common golf cart battery issues and get back to enjoying your rides hassle-free, let’s move further and talk more in deep about How Do You Troubleshoot A Golf Cart Battery?
Importance of Golf Cart Batteries
Golf cart batteries play a vital role in the performance of the vehicle. Here are a few reasons why they are essential:
1. Power Source: Golf cart batteries are responsible for supplying the necessary power to the motor, allowing the cart to move smoothly on the golf course.
2. Performance: A well-maintained and fully charged battery ensures optimal performance, allowing users to enjoy a comfortable and uninterrupted ride.
3. Longevity: Proper care and maintenance of the battery can prolong its lifespan, saving you money on frequent replacements.
While golf cart batteries are designed to be reliable, they can experience various issues over time. Here are some common problems faced by golf cart battery users:
1. Insufficient Charge: If the battery is not holding a charge or discharging quickly, it can lead to reduced performance and shorter driving range.
2. Corrosion: Corrosion on battery terminals can hinder the flow of electricity and affect the battery’s performance.
3. Water Level: Golf cart batteries require regular maintenance, including checking and replenishing the water levels. Insufficient water levels can lead to decreased battery performance.
4. Sulfation: Sulfation occurs when lead sulfate crystals build upon the battery plates, reducing its capacity and overall performance.
5. Overcharging or Undercharging: Improper charging techniques, such as overcharging or undercharging, can shorten the battery’s lifespan and affect its performance.
By understanding these common problems, golf cart owners can troubleshoot and address any battery-related issues, ensuring optimal performance and longevity.
Checking Battery Connections
When troubleshooting a golf cart battery, one of the first steps is to check the battery connections. Poor connections can lead to issues with battery performance and can even prevent the cart from starting. Here are a few steps to follow when inspecting and maintaining battery connections:
Inspecting battery cables and terminals
• Visually inspect cable connections: Start by visually inspecting the battery cables and terminals for any signs of damage or corrosion. Look for frayed or loose cables and any signs of rust or corrosion on the terminals.
• Check for loose connections: Gently tug on each battery cable to ensure they are securely connected to the terminals. Loose connections can cause intermittent power issues, so it’s essential to make sure they are tight.
Cleaning and tightening battery connections
• Clean corroded terminals: If you notice any corrosion on the battery terminals, it’s important to clean them thoroughly. Disconnect the cables and use a mixture of baking soda and water to scrub away the corrosion with a wire brush. Rinse the terminals with clean water and dry them before reattaching the cables.
• Tighten loose connections: If you find any loose connections, use a wrench or pliers to tighten them securely. Be careful not to overtighten as this can damage the terminals.
Taking the time to inspect and maintain battery connections can help ensure proper power delivery and extend the lifespan of your golf cart batteries.
RELATED: How Does The Battery System Work In An Electric Golf Cart?
Testing Battery Voltage
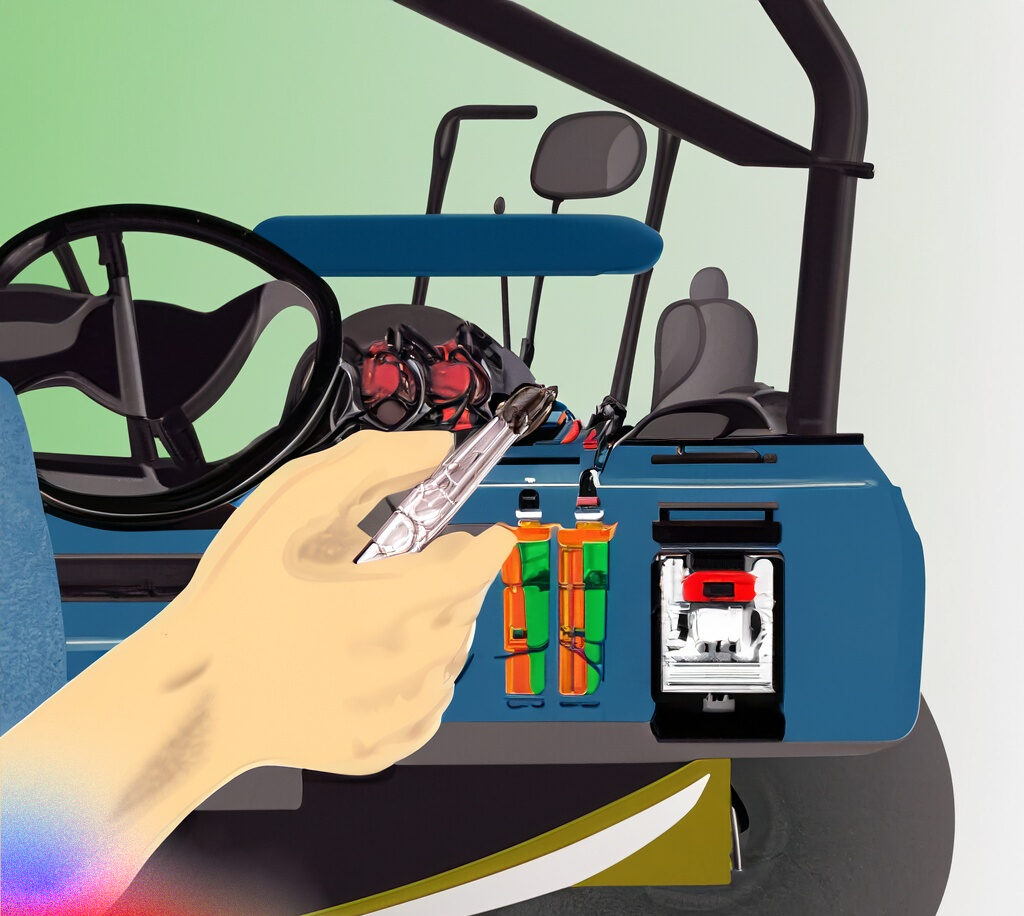
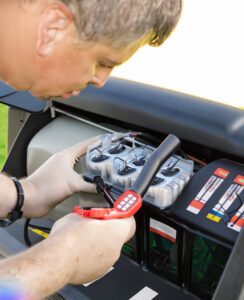
Using a multimeter to check the battery voltage

When troubleshooting a golf cart battery, one of the first steps is to test the battery voltage. This can be done using a multimeter, which is a tool used to measure electrical voltage, current, and resistance. Follow these steps to test the battery voltage:
- Set the multimeter to the DC voltage setting. Ensure that the range is appropriate for the battery voltage.
- Connect the multimeter’s positive (+) lead to the positive terminal of the battery and the negative (-) lead to the negative terminal. Make sure the connections are secure.
- Read the voltage displayed on the multimeter. This reading will indicate the battery voltage.
Interpreting voltage readings and what they mean
The voltage reading obtained from the multimeter can provide valuable information about the battery’s condition. Here are some general guidelines for interpreting voltage readings:
- A voltage reading between 12.4V and 12.7V indicates a fully charged battery.
- If the voltage reading is below 12.4V, it suggests that the battery may be discharged and in need of recharging. The lower the voltage reading, the more discharged the battery is.
- A voltage reading below 12V indicates a significantly discharged or potentially faulty battery. In this case, recharging or replacing the battery may be necessary.
It’s important to note that specific voltage requirements may vary depending on the type and model of the golf cart battery. Refer to the manufacturer’s guidelines or consult a professional if you are unsure about the appropriate voltage range for your golf cart battery.
By testing the battery voltage and understanding the readings, you can gain insights into the condition of your golf cart battery and take necessary steps to troubleshoot and maintain its performance.
Battery Charger Troubleshooting
Identifying charger issues
When troubleshooting your golf cart battery, it’s important to also consider the battery charger itself. Here are some common charger issues to look out for:
- No power: If the charger does not turn on or show any signs of power, there may be an issue with the power source or the charger itself.
- Overheating: If the charger becomes excessively hot during the charging process, it may indicate a problem with the charger or the battery.
- Faulty display: If the charger’s display does not show any information or displays error messages, it could be a sign of a malfunction.
- Slow charging: If the battery takes considerably longer to charge than usual, there may be an issue with the charger or the battery itself.
Checking charger connections and settings
Before assuming there’s an issue with the battery or the charger, it’s essential to check the following:
- Connections: Ensure that the charger is properly connected to the power source and the battery terminals. Loose or damaged connections can affect the charging process.
- Settings: Check the charger’s settings to ensure they are correctly configured for the type of battery you have. Refer to the charger’s manual for the recommended settings.
- Cleanliness: Inspect the charger and its components for any dirt, debris, or corrosion. Clean the charger and terminals if necessary, as these can impede proper charging.
If you have followed these troubleshooting steps and are still experiencing issues with your golf cart battery or charger, it may be time to seek professional assistance or consider replacing the battery or charger entirely. Remember to always refer to the manufacturer’s instructions and guidelines for proper troubleshooting and maintenance.
Battery Load Testing
Understanding load testing and its benefits
Battery load testing is a crucial step in troubleshooting golf cart batteries. This test helps determine the overall health and performance of the batteries by subjecting them to a simulated load. Here are some benefits of load testing:
- Identifying weak batteries: Load testing can reveal weak or failing batteries that may not be apparent through visual inspection alone. Weak batteries can affect the performance and lifespan of the entire battery pack.
- Preventing unexpected failures: Load testing can help detect potential battery failures before they occur. By identifying weak batteries, they can be replaced before they cause a complete breakdown.
- Extending battery lifespan: Regular load testing allows for preventive maintenance and replacement of weak batteries. This helps optimize the overall battery pack performance and extend its lifespan.
RELATED: What Is the Mileage Range of an Electric Golf Cart?
Performing a load test on golf cart batteries
To perform a load test on golf cart batteries, follow these steps:
- Ensure safety: Make sure to wear proper protective equipment, such as gloves and safety glasses, before proceeding.
- Disconnect the batteries: Disconnect all the batteries in the pack from the cart’s electrical system.
- Prepare load tester: Set up the load tester according to the manufacturer’s instructions, making sure the load tester is compatible with the voltage and capacity of the batteries.
- Apply load: Connect the load tester to the battery pack and apply a simulated load for a specific duration, typically around 15 seconds.
- Monitor voltage drop: Monitor the voltage drop during the test. If the voltage drops significantly, it indicates a weak or failing battery.
- Interpret the results: Based on the voltage drop, determine the condition of each battery. Replace any weak or failing batteries to maintain the overall performance of the battery pack.
Regularly performing load tests on golf cart batteries can help ensure optimal performance and prevent unexpected breakdowns. Consult the manufacturer’s instructions or seek professional assistance for more specific guidelines and recommendations for your golf cart battery.
Battery Water Level Check
Importance of proper water levels in batteries
Maintaining proper water levels in your golf cart battery is crucial for its performance and longevity. Water acts as a coolant, preventing the battery from overheating during charging and discharging cycles. Additionally, water is crucial for the chemical reactions that occur within the battery, allowing it to generate and store electrical energy efficiently. Proper water levels also help prevent damage to the internal plates and prolong the overall lifespan of the battery.
Steps to check and fill battery water
Checking and filling the water levels in your golf cart battery is a straightforward process. Here are the steps to follow:
1. Safety First: Ensure you are wearing protective gloves and safety goggles before starting any work on the battery.
2. Open the Battery Compartment: Depending on your golf cart model, locate and open the battery compartment to access the batteries.
3. Inspect the Water Levels: Each battery cell should have lead plates covered with water. Make sure the water level is above the plates but below the maximum level indicated on the battery.
4. Add Distilled Water if Needed: If the water levels are low, use distilled water to fill each battery cell until the plates are adequately immersed.
5. Avoid Overfilling: Do not overfill the batteries with water as it can cause electrolyte overflow and damage the battery. Maintain the water level between the minimum and maximum markers.
6. Close the Battery Compartment: Once you have checked and filled the water levels, ensure the battery compartment is securely closed to protect the batteries from any external damage.
Regularly checking and maintaining the water levels in your golf cart battery is essential for optimal performance and longevity. Always refer to the manufacturer’s guidelines for specific instructions on maintaining your particular battery model.
Remember, safety precautions should be followed when working with batteries, and if you are unsure about any steps or need professional assistance, it is recommended to consult a qualified technician.
Thermal Troubleshooting
Dealing with battery overheating issues
When troubleshooting a golf cart battery, one of the common issues that can arise is battery overheating. Overheating can be caused by a variety of factors, including excessive charging, high ambient temperatures, or a faulty battery. Here are some steps you can take to address battery overheating issues:
- Check the charging system: Ensure that the charger is functioning properly and not overcharging the battery. Overcharging can lead to overheating, so it’s important to use a charger that is compatible with your golf cart battery.
- Inspect the battery connections: Loose or corroded battery connections can cause increased resistance and generate heat. Make sure the battery terminals are clean, tight, and free from corrosion.
- Monitor ambient temperatures: High ambient temperatures can put additional stress on the battery and increase the risk of overheating. If possible, avoid operating the golf cart in extreme heat conditions.
Identifying and addressing thermal problems
In addition to battery overheating, other thermal problems can occur in golf cart batteries. These include:
- Battery freezing: In cold temperatures, the electrolyte inside the battery can freeze, causing damage to the battery. To prevent freezing, store the battery in a climate-controlled area or use a battery warmer during winter months.
- Battery venting: If a battery is venting excessive gas or emitting a strong odor, it could indicate an internal problem. Venting can lead to thermal runaway, which can be dangerous. In this case, it’s best to have the battery inspected by a professional.
- Uneven cell temperatures: If certain cells of the battery are significantly hotter or colder than others, it could indicate an imbalance in the battery pack. This can lead to reduced performance and premature battery failure. Balancing the cells through proper charging and maintenance can help address this issue.
If you are experiencing any thermal problems with your golf cart battery and are unsure how to address them, consult the manufacturer’s guidelines or seek assistance from a qualified technician. Taking proper care of your battery will help prolong its lifespan and ensure reliable performance on the golf course.
RELATED: How To Remove The Speed Limiter On A Electric Golf Cart?
Replacing Faulty Batteries
Signs of a faulty battery
When troubleshooting a golf cart battery, it’s important to recognize the signs of a faulty battery. Here are some common indicators that a battery may need to be replaced:
1. Reduced Run Time: If your golf cart’s battery is not holding a charge for as long as it used to, it may be a sign that the battery is no longer functioning properly.
2. Slow or Weak Performance: If your golf cart is moving at a slower speed or struggling to climb hills, it could be due to a weak or damaged battery.
3. Battery Bulging or Leaking: Bulging or leaking batteries are a clear sign of internal damage and should be replaced immediately.
Steps to safely replace a golf cart battery
Replacing a faulty battery in your golf cart can be done following these steps to ensure a safe and hassle-free process:
1. Safety Precautions: Before replacing the battery, make sure to turn off the golf cart, remove the key, and engage the parking brake. Wear protective gloves and eyewear to prevent any accidents.
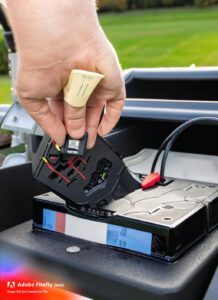
2. Battery Inspection: Inspect the battery compartment for any signs of corrosion, loose cables, or other damage. Clean the battery terminals, removing any corrosion with a wire brush. Ensure that the battery cables are tight and secure.
3. Disconnecting the Battery: Start by disconnecting the negative (black) cable from the battery, followed by the positive (red) cable. Remove any hold-down brackets or straps that secure the battery in place.
4. Removing the Old Battery: Carefully lift the old battery out of the compartment and place it in a suitable container to prevent any acid spills. Dispose of the old battery at a designated battery recycling center.
5. Installing the New Battery: Place the new battery in the compartment, ensuring that it is correctly positioned. Reinstall any hold-down brackets or straps, making sure the battery is secure. Connect the positive (+) cable first, followed by the negative (-) cable.
6. Testing the New Battery: Once the new battery is installed, turn on the golf cart and test its performance. Take it for a short drive to confirm that the battery is functioning correctly.
Replacing a faulty golf cart battery is essential for maintaining optimal performance and ensuring a reliable power source. By following these steps, you can safely replace the battery and get back to enjoying your golf cart.
Preventive Maintenance Tips
Best practices for extending battery life
To ensure your golf cart batteries are in good condition and last as long as possible, here are some best practices for preventive maintenance:
1. Proper Charging: Follow the manufacturer’s instructions for charging your golf cart batteries. Overcharging or undercharging can shorten the battery life.
2. Avoid Deep Discharges: Try to avoid fully discharging the batteries before recharging them. Deep discharges can damage the battery cells and reduce their capacity.
3. Water Level Checks: Regularly check the water level in the battery cells and add distilled water if necessary. Maintaining the proper water level helps prevent the battery from drying out.
4. Clean and Inspect Terminals: Keep the battery terminals clean and free from corrosion. Use a mixture of baking soda and water to clean the terminals, and ensure they are securely tightened.
5. Equalization Charging: Perform an equalization charge every now and then to help balance the charge levels across the battery cells. This process can help prolong the battery life.
Regular maintenance routine for golf cart batteries
To keep your golf cart batteries in optimal condition, follow this regular maintenance routine:
1. Clean the Exterior: Use a mild detergent and water to clean the exterior of the batteries. This helps prevent dirt and debris buildup that can affect the battery’s performance.
2. Check Cable Connections: Inspect the cable connections for tightness and cleanliness. Loose or corroded connections can impede the battery’s performance.
3. Monitor Voltage Levels: Use a digital voltmeter to measure the voltage levels of each battery. Abnormal voltage readings may indicate a problem with a specific battery.
4. Perform Battery Load Test: Regularly conduct a load test to evaluate the battery’s capacity and performance. This test helps identify any weak batteries that may need replacement.
5. Keep Batteries Charged: When not in use, keep the golf cart batteries fully charged. Storing them in a discharged state can lead to sulfation, which can damage the battery.
By following these preventive maintenance tips and maintaining a regular maintenance routine, you can troubleshoot potential issues with your golf cart batteries and ensure they perform optimally for years to come.
FAQ: Golf Cart Battery
If you’re experiencing issues with your golf cart battery, you’re not alone. Here are some frequently asked questions and answers to help you troubleshoot and resolve common battery problems:
Q: Why is my golf cart battery not holding a charge?
A: There could be several reasons why your golf cart battery is not holding a charge. It could be due to sulfation, low water levels, a faulty charger, or a battery that has reached the end of its lifespan. Check the water levels, clean the battery terminals, and consider testing the battery’s voltage to determine if it needs to be replaced.
Q: How can I prevent sulfation in my golf cart battery?
A: Sulfation is a common issue in lead-acid batteries and can significantly reduce their performance. To prevent sulfation, make sure to regularly charge your batteries, avoid deep discharges, and use a desulfator or battery maintenance device.
Q: What should I do if my battery cables are corroded?
A: Corroded battery cables can prevent proper electrical conductivity and affect the performance of your golf cart battery. You can clean the corroded cables using a mixture of baking soda and water, scrubbing them with a wire brush, and applying a corrosion inhibitor to prevent future corrosion.
Q: How often should I check the water levels in my golf cart battery?
A: It is recommended to check the water levels in your golf cart battery every 1-2 months, especially during hot weather conditions or frequent use. Make sure to add distilled water if the levels are low and avoid overfilling the cells.
Q: How long can I expect my golf cart battery to last?
A: The lifespan of a golf cart battery can vary depending on several factors, including the quality of the battery, maintenance, usage patterns, and environmental conditions. On average, a well-maintained golf cart battery can last anywhere from 4-7 years.
Remember, if you’re unsure about any troubleshooting procedures or if your battery issues persist, it’s always best to consult a professional or the manufacturer for assistance. Taking proper care of your golf cart battery can help extend its lifespan and ensure optimal performance on the golf course.
Conclusion
Troubleshooting a golf cart battery can be a straightforward process if you follow the right steps. Here’s a recap of the troubleshooting process:
- Check the battery connections: Make sure that the battery cables are securely connected and free from corrosion. Clean any corrosion with a mixture of baking soda and water.
- Test the battery voltage: Use a multimeter to test the voltage of the battery. A fully charged battery should read around 12.6 volts. If the voltage is significantly lower, the battery may need to be charged or replaced.
- Charge the battery: If the battery voltage is low, use a battery charger to recharge the battery. Make sure to follow the manufacturer’s instructions and charge the battery in a well-ventilated area.
- Inspect the battery for damage: Check the battery for any signs of physical damage or leaking. If you notice any cracks or leaks, the battery may need to be replaced.
- Test the charger: If the battery is not charging properly, test the charger using a voltmeter. If the charger is not providing the correct voltage, it may need to be repaired or replaced.
Remember to always prioritize safety when working with golf cart batteries. If you are unsure about any part of the troubleshooting process, it is best to consult a professional.
By following these troubleshooting steps, you can identify and resolve common issues with your golf cart battery, ensuring that it operates optimally and delivers the power you need on the golf course. Happy golfing!

I’m Donna Weiss, and I am the proud writer behind the captivating content you’ll find on golfneedy.com. As an avid golfer and passionate writer, I have combined my two greatest passions to bring you an incredible golfing experience. Through my articles, I aim to provide you with valuable insights, equipment reviews, and updates on the latest tournaments. Whether you’re a seasoned golfer or just starting out on this exciting journey, I am here to guide you and share my expertise. Together, let’s explore the fascinating world of golf, uncovering new techniques, and enhancing our skills. Join me on this thrilling adventure as we elevate our game and embark on an exciting golfing journey. Read More