If you’re a golf enthusiast, you’ve likely heard of face balanced and toe hang putters, but you may be unsure about what these terms mean and how they can impact your game. In this article, we’ll delve deeper into these golfing terms to help you understand which putter is right for you.
When you hold a putter parallel to the ground, the club-face points upwards, right? That’s a face-balanced putter. This type is designed for golfers who have a straight back and straight through putting stroke, meaning the putter’s path moves straight back and then straight forward, with the face pointing at the target all the time. On the other hand, if the toe droops and points towards the ground, you have a toe hang putter. This style suits golfers who have an arc in their putting stroke.
Key Takeaways
- Choosing the right putter depends on your individual putting stroke and personal preference.
- Face balanced putters are ideal for golfers with a straight back and straight through putting stroke.
- Toe hang putters are suitable for golfers with an arc in their putting stroke.
Face Balanced Putters
If you are looking for a golf club that stays perfectly balanced when you balance it on your finger, then you might want to try a face balanced putter. In this section, we will define and explain face-balanced putters, discuss their advantages and benefits, and give you some examples of popular face-balanced putters in the market.
Definition and Explanation of Face-Balanced Putters
Face Balanced Putters are golf clubs designed to stay perfectly balanced when you balance them on your finger. The club’s striking face points upwards, towards the sky. These types of putters are geared towards golfers with a straight back and straight-through putting stroke. Face balanced putters are designed to have their center of gravity aligned with the shaft axis, which means that they will remain square to the target line throughout the stroke.
Advantages and Benefits of Using Face Balanced Putters
Face balanced putters can offer several advantages and benefits to golfers, including:
- Reduced Twist: The lack of torque in face balanced putters reduces the tendency to twist during the stroke, helping you maintain consistency.
- Straight Path: They are perfect for those with a straight putting stroke, as it helps to keep the putter face in line with the direction of the stroke.
- Improved Performance: Face balanced putters can improve your game performance, boosting accuracy and reducing the chance for miss-hits.
Examples of Popular Face-Balanced Putters in the Market
Here are some popular face balanced putters that you may come across:
- Odyssey Stroke Lab Versa: This putter uses Stroke Lab technology designed to help golfers’ stroke, including a higher moment of inertia for more consistency.
- Ping Sigma 2 Fetch: Adjustable-length and a special dual-durometer PEBAX insert make this putter a favorite among golfers who prefer face-balanced putters.
- Scotty Cameron Phantom X: These putters have been meticulously crafted with precision milling and modern shaping to help golfers hole more putts.
- TaylorMade Spider EX: It boasts of enhanced stability, easy alignment features, and improved feel for confidence on the green.
Remember, the choice between face-balanced and toe hang putters eventually boils down to your individual stroke and comfort level. So, trust your feel, the visual appeal of the putter, and of course, your performance on the green while making a choice. Happy golfing!
Toe Hang Putters
When it comes to choosing the right putter, one of the decisions you’ll need to make is whether to go for a toe hang putter or a face-balanced putter. In this section, we’ll take a closer look at toe hang putters, including their definition, advantages, and examples of popular toe hang putters in the market.
Definition and Explanation of Toe Hang Putters
A toe hang putter is a putter that has its toe, the end of the putter farthest from the hosel, pointing straight down towards the ground when held horizontally. This design is intended to fit a specific style of stroke, typically one that has an arc motion or where the player has a habit of opening and closing the putter face during the stroke.
Advantages and Benefits of Using Toe Hang Putters
There are several advantages to using a toe hang putter. Firstly, for golfers with a strong arc (in-to-in stroke), a toe hang putter may be an excellent choice. Its weight distribution encourages the club face to open relative to the swing’s path on the backstroke and close on the follow-through, ensuring a better strike. Secondly, golfers feel like they have more control over the stroke with a toe hang putter, allowing them to make more aggressive shots confidently.
Examples of Popular Toe Hang Putters in the Market
Here are some examples of popular toe hang putters in the market:
| Putter Model | Features |
|---|---|
| Odyssey O-Works #1 | Progressive mallet shapes with weighted alignment wings, a double-bend shaft, and a full-shaft offset |
| TaylorMade Spider Tour Red | Sleek design with movable weight technology |
| Scotty Cameron Select Newport 2 | Superior quality with a soft but solid feel upon impact and great alignment features |
Seeing a trend in your putting stroke can help you identify if a face-balanced or a toe-hang putter would be a good fit. Remember, having the right equipment is only part of the game. Strokes also matter. Golf is just as much about skill as having the right clubs in your bag. Happy Golfing!
Tools and Materials Needed
You’re excited about the prospect of improving your golf game, but your putter’s shaft is just too long. Don’t worry, friend! Shortening it is relatively straightforward, and with the right tools and guidance, you’ll have a custom-sized putter in no time! And guess what, you get to do it all by yourself, giving that personal touch to your equipment.
List of tools and materials required for the process
You will need certain tools and materials, luckily, most of them are probably there in your garage. If not, a quick trip to your local hardware store will set you up.
- Tape Measure: To accurately measure your putter’s current length, and to mark where you may need to cut it.
- Hacksaw or Pipe Cutter: For the actual trimming process. A pipe cutter would ensure a cleaner cut.
- Sandpaper: To smooth the cut edge and protect your hand from any sharp edges.
- Masking Tape: To prevent potential splintering and to secure the grip while it dries.
- Grip Solvent and Double-sided Tape: To install the putter grip.
| Tool | Description | Usage |
|---|---|---|
| Putter Head | The weighted end of the putter | Must be removed before shortening the shaft |
| Shaft | The long, slender part of the putter | Needs to be shortened to desired length |
| Metal Pipe Cutter | A tool designed to cut metal pipes | Used to cut the shaft to the desired length |
Using a metal pipe cutter is the most precise way to shorten a putter shaft. It ensures a clean and accurate cut without damaging the shaft’s integrity. Before starting, remove the putter head from the shaft. Secure the shaft in the metal pipe cutter and tighten it. Slowly rotate the cutter around the shaft, applying gentle pressure until it cuts through. Measure and mark the desired length beforehand to ensure accuracy. Remember to wear protective gloves and eyewear during the process. With the right tools and careful execution, you can successfully shorten your putter shaft to your desired length.
Adjusting Putter Length
No more worrying about awkward stances and uncomfortable swings. Shortening your putter shaft is a straightforward process that you’ll learn in a cinch. With the right tools and a bit of patience, you’ll have an adjusted putter in no time.
Tips and techniques on finding the optimal length for your putter
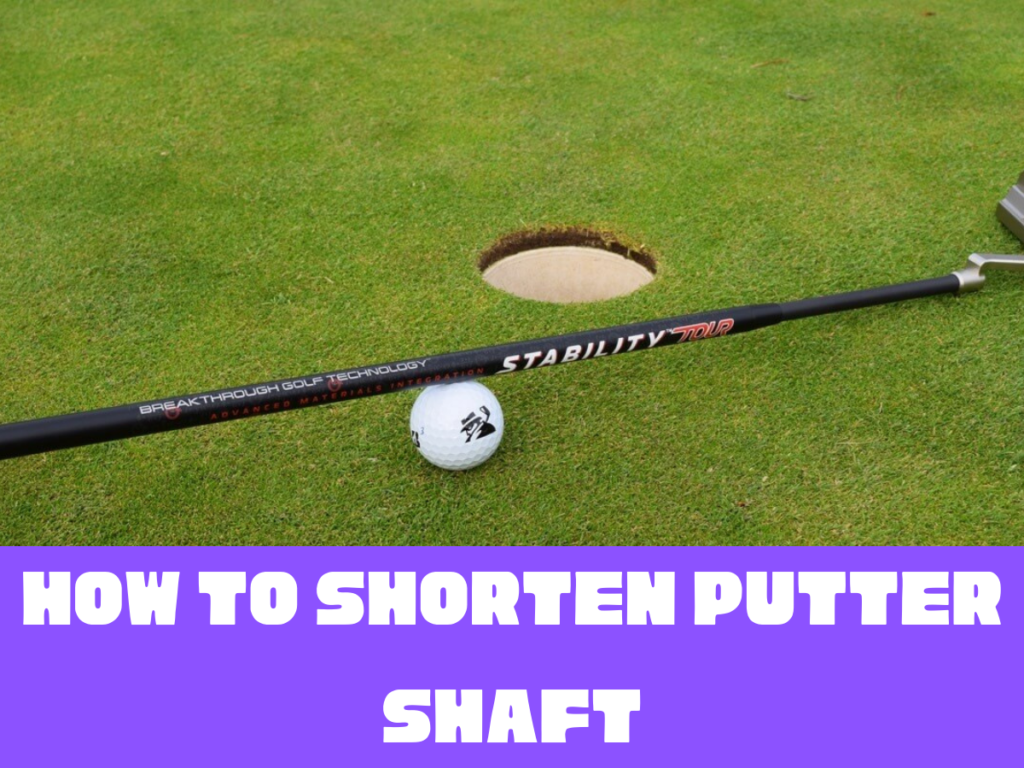
Finding the right length: Grab your putter and stand in your golf stance. Your eyes should directly line up with the ball, and your hands should be directly beneath your shoulders. If your putter length doesn’t allow for this posture, it’s not the right size for you!
Choosing the correct equipment: To shorten your putter shaft, you’ll need a hacksaw, a mallet, a vice, a measuring tape, and new grip for the handle.
Measuring and cutting the shaft: Once you’ve decided on the correct length, use the measuring tape to mark where you want to cut. Secure the putter in the vice and use the hacksaw to gently saw through the shaft at the marked area.
Putting on the new grip: After cutting the shaft, you’ll need to put on a new grip. Apply double-sided tape, peel the backing off, and add grip solvent. Finally, slip the new grip onto the shaft and let it sit overnight.
So there you have it! It’s time to show off that improved swing. The golf course better be ready for you and your tailored putter! And remember, gaining mastery takes practice, so don’t give up. A perfect putt is just a swing away! Now, go out there, shorten that putter shaft, and start sinking putts like never before! You’ve got this!
Preparatory Steps: Safely Securing Your Putter

We need to ensure that our putter is safely secured before beginning the process. This is crucial to prevent any accidents or damage to the club. Here are some preparatory steps to follow:
- Cutting tool: Use a high-quality cutting tool to ensure a clean and precise cut. This will help maintain the integrity of the putter shaft.
- Grip down: Before cutting, mark the desired length on the shaft using a measuring tape. Then, grip down on the shaft to prevent any slippage during the cutting process.
- Vice: Secure the putter shaft in a vice to provide stability and support. This will allow for a controlled cut and minimize the risk of any mishaps.
Removing the Grip: A Detailed Guide
After securely fastening the putter in a vice, we can begin removing the grip by using a utility knife to carefully cut along the length of the grip. This process requires precision and attention to detail in order to avoid damaging the shaft or grip. Here is a detailed guide on how to remove the grip from your putter:
| Steps | Description |
|---|---|
| Step 1 | Securely fasten the putter in a vice to provide stability during the process. |
| Step 2 | Use a utility knife to make a shallow cut along the length of the grip. Be careful not to cut into the shaft. |
| Step 3 | Slowly peel back the grip, applying gentle pressure to separate it from the shaft. Work your way around the entire grip until it is fully removed. |
| Step 4 | Clean any residue left on the shaft using a solvent or grip tape remover. |
| Step 5 | Once the grip is removed, you can proceed to cutting down the shaft to your desired length. |
With the grip successfully removed, we can now move on to the next step: cutting down the shaft.
Cutting Down The Shaft: Techniques and Tips
Now that the grip has been removed, let’s discuss different techniques and tips for cutting down the length of the shaft. Shortening the shaft of a putter can greatly improve your game by allowing for better control and accuracy. Here are some techniques and tips to consider:
- Measure twice, cut once: Before making any cuts, carefully measure the desired length of the putter shaft. Remember to take into account your height, stance, and personal preference.
- Use a cutting tool: Invest in a high-quality cutting tool specifically designed for golf club shafts. A rotary tool with a cutting wheel is a popular choice. Be sure to follow the manufacturer’s instructions for safe and precise cutting.
- Smooth the edges: After cutting down the shaft, use sandpaper or a file to smooth out any rough edges. This will ensure a comfortable grip and prevent any potential injuries.
Dealing With Graphite Shafts: A Special Case
Be aware of graphite shafts’ distinctive traits and how they differ from conventional shafts. Graphite shafts are lightweight and flexible, improving golf club performance. Shortening a graphite shaft requires some careful considerations. First, get a DIY utility knife and a solvent to remove the old grip. Second, cut the shaft carefully since graphite might splinter. Finally, consider your putter length and cut precisely. Following these steps, you may shorten a graphite shaft and improve your golfing experience.
| DIY Tools | Safety Tips | Step-by-Step | Expert Tip |
|---|---|---|---|
| Utility knife | Use protective eyewear | Measure and mark desired length | Apply a small amount of solvent to ease grip removal |
| Solvent | Cut slowly and evenly | Secure the shaft before cutting | Sand the cut edge for a smooth finish |
| Handle graphite with care | Clean and dry the shaft after cutting | Consider using a shaft extension if needed |
Now that you are familiar with the unique characteristics of graphite shafts, let’s move on to the next step: installing the new grip.
Installing the New Grip: Step-by-step Procedure

To begin installing the new grip, we carefully slide it onto the end of the graphite. Ensuring a secure fit is essential for optimal performance and control. Here is a step-by-step procedure to guide you through the process:
- Remove the old grip: Using a grip removal tool or a utility knife, carefully cut and peel off the old grip, being cautious not to damage the shaft.
- Measure and mark: Determine the desired length of the shortened putter shaft. Use a measuring tape or ruler to mark the new length on the shaft, ensuring accuracy.
- Cut and reattach: Using a hacksaw or a pipe cutter, carefully cut the shaft at the marked point. Once cut, remove any burrs or sharp edges. Reattach the grip onto the newly shortened shaft, ensuring it’s aligned properly.
By following this step-by-step procedure, you can confidently install a new grip and shorten your putter shaft to suit your preferences and improve your putting game.
Remember to take your time and maintain precision throughout the process.
Testing and Fine-Tuning
Hooraay! You’ve successfully shortened your putter shaft! It’s an electrifying experience, isn’t it? But the fun doesn’t stop here. Now, it’s time to test your new weapon on the playful battleground – the green!
Methods to assess the newly shortened putter and make necessary adjustments
- Hit the Green: Your first sentinel check should be a real, golf-playing experience. Head on to your favorite golf course and get a feel of your rejuvenated putter. Don’t forget to watch out for any changes in the stroke and how the ball reacts!
- Check Your Comfort: Comfort is everything in golf! Take note if your posture feels more natural while aligning the putt. If it doesn’t, don’t lose hope. All you have to do is make few adjustments until you find your sweet spot.
- Fine Tuning: If you’re feeling a little out of sync with your new putter, don’t worry! Look for the cause – is it too short? Too light? You can add weight to the putter head or even revert the changes by adding an extension to your putter shaft.
- Remember Practice: Practice makes perfect! Remember, change is hard at first but keep practicing until it feels perfect. Remember the joy of this process, it is all meant to refine your game and make it more enjoyable.
Here’s a friendly table summarizing your post-putter-shortening journey:
| Step | Explanation |
|---|---|
| Hit the Green | Play live and observe the changes in stroke and ball reaction. |
| Check Comfort | Ensure your posture feels natural with the new putter length. Make adjustments as necessary. |
| Fine Tuning | Add weight or lengthen if necessary. |
| Practice | Perfect your stroke with the newly adjusted putter through regular practice. |
Keep your spirits high and your strokes low! Your freshly tailored putter is set to be your winning secret in your next round of golf.
Checking Balance and Swing: Post-adjustment Measures
After adjusting the grip, evaluate the golf club’s balance and swing for best performance.
Balance requires uniform weight distribution throughout the club. We can check this by balancing the club on our finger below the grip. If it tilts, we can balance it by adding weight to the other end.
Next, evaluate swing weight points. These are weight distribution along the club. A swing weight scale can quantify this. Adjusting weight distribution can improve our swing feel and golf play.
Troubleshooting: How to Overcome Common Problems

When it comes to shortening a putter shaft, it’s not uncommon to encounter some common problems along the way. But fear not, as we’re here to guide you through troubleshooting and overcoming these hurdles.
One common issue is a tight or stuck nut that makes it difficult to loosen and adjust the shaft to the desired length. In such cases, using a wrench or pliers with a good grip can help loosen the nut.
Another problem you may face is accidentally cutting the shaft shorter than the desired length. To avoid this, it’s crucial to measure and mark the desired length accurately before making any cuts.
Lastly, be mindful of the overall balance and weight distribution of your putter after the shaft has been shortened, as it can affect your swing.
With these troubleshooting tips in mind, let’s move on to the subsequent section where we’ll discuss maintenance tips for your shortened putter shaft.
Maintenance Tips for Your Shortened Putter Shaft
As we maintain a shortened putter shaft, it’s important to regularly clean and inspect it for any signs of damage or wear. Proper maintenance ensures optimal performance and longevity of your club.
To keep your shortened putter shaft in top condition, here are some essential maintenance tips.
Firstly, after each round, wipe down the shaft with a clean, damp cloth to remove any dirt or debris. Pay close attention to the grip area and make sure it’s free from any residue.
Secondly, inspect the shaft for any cracks, dents, or signs of wear. If you notice any damage, it’s crucial to address it promptly to prevent further issues.
Finally, consider using a protective headcover to safeguard the shaft during transportation and storage.
Conclusion
After an in-depth discussion, it’s clear that both face balanced and toe hang putters have their unique characteristics, making them suitable for different types of strokes. Here is a summary of the main points discussed:
Summary of the main points discussed
The face balanced putters, with their face facing up, are generally ideal for players who have a straight back and straight through stroke, as they help in maintaining a straight line. On the other hand, the toe hang putters with their toe pointing to the ground, tend to work best for players with an arc in their stroke, allowing the face of the putter to open and close naturally.
Encouragement to experiment and find the best putter for your game
There is no golden rule that determines the perfect putter. It’s more about individual comfort and performance. We encourage you to experiment, trying out both face balanced and toe hang putters. It’s not uncommon for golfers to have several putters in their bag, using different ones depending on the situation at hand.
Final thoughts on the face-balanced vs toe-hang putter debate
In wrapping up this tale of two putters, it should be mentioned that one is not superior to the other. It’s about understanding your style, mastering your stroke, and matching it with the most compatible putter. As a golfer, the putter choice lays right in your hands. Therefore, wisdom lies in continuous practice and learning, eventually leading you to identify the kind of putter that provides the most advantage in your gameplay. Whether you choose a face balanced putter or a toe hang one, the ultimate goal is to improve your accuracy, control, and confidence on the green.
In conclusion, the choice between a face balanced and a toe hang putter is a personal one. It is essential to find a putter that feels comfortable and natural in your hands. Experimenting with different putters can help you discover which one works best for you. Remember, the goal is not to find the perfect putter, but to find the one that helps you perform the best. Keep practicing, experimenting, and learning, and you will undoubtedly find the putter that suits your gameplay.
Frequently Asked Questions
What is the proper way to measure a putter before cutting it to length?
Before cutting a putter shaft to length, you need to measure the length of the putter shaft. You can measure the length of the putter shaft by placing the putter on a flat surface and measuring the distance from the sole of the putter to the top of the grip. Make sure to measure the length of the putter shaft accurately to avoid any errors when cutting it to length.
How does one tip trim a putter shaft correctly?
To tip trim a putter shaft correctly, you need to remove the grip from the putter shaft and measure the length of the tip section. After measuring the tip section, you can use a shaft cutter to trim the tip section to the desired length. Make sure to use a shaft cutter that is designed for putter shafts to avoid damaging the shaft.
What are the steps involved in cutting down a putter shaft?
To cut down a putter shaft, you need to follow the steps mentioned below:
- Measure the length of the putter shaft.
- Remove the grip from the putter shaft.
- Use a shaft cutter to trim the putter shaft to the desired length.
- Reinstall the grip on the putter shaft.
Are there any special considerations when shortening a Stroke Lab putter?
When shortening a Stroke Lab putter, you need to be careful not to damage the shaft. Stroke Lab putters have a unique weighting system that requires a specific cutting technique. It is recommended to consult a professional club fitter or the manufacturer before shortening a Stroke Lab putter.
What is the typical cost associated with professionally shortening a putter shaft?
The cost of professionally shortening a putter shaft can vary depending on the club fitter or manufacturer. Typically, the cost ranges from $20 to $50. It is recommended to check with multiple club fitters or manufacturers to get an accurate estimate.
How do I choose the right grip after cutting my putter to a shorter length?
After cutting your putter to a shorter length, you need to choose a grip that is suitable for your hand size and stroke. A grip that is too small or too large can affect your ability to control the putter. It is recommended to consult a professional club fitter or try out different grips before making a final decision.

I’m Donna Weiss, and I am the proud writer behind the captivating content you’ll find on golfneedy.com. As an avid golfer and passionate writer, I have combined my two greatest passions to bring you an incredible golfing experience. Through my articles, I aim to provide you with valuable insights, equipment reviews, and updates on the latest tournaments. Whether you’re a seasoned golfer or just starting out on this exciting journey, I am here to guide you and share my expertise. Together, let’s explore the fascinating world of golf, uncovering new techniques, and enhancing our skills. Join me on this thrilling adventure as we elevate our game and embark on an exciting golfing journey. Read More